Tag Archives: appetizer

Feasting

Standard
Feasting

If you’re sensitive to pictures of dead animals, you might want to avoid this blog post.

Man, I am still behind on recipes! I’m sorry that I’ve been slacking on the blog-front; it’s been a little busy around here and I’ve not been in the blogging mood. But before I cook anything else, I want to catch you up on everything that I haven’t posted. So I’m going to start a while back with the feast that we had. A few days after The Boyfriend’s party, he and I started kicking around the idea of doing a feast.

We usually had a feast as a celebration for The Boyfriend’s birthday but we hadn’t this year. The feast would have a $10-$15 buy-in and there was usually six or eight of us who would buy in. We’d buy crab legs and shrimp and scallops and sometimes lobster tails. It’s always been a good excuse for a fun night with friends and a fancy dinner at low cost. We wound up deciding to do a small feast with just a few friends in Albany; with our $40 budget, we bought shrimp, lobster (tails and claws), sea scallops, and a duck. Roasted duck is one of my favorite things to make in part because it’s so easy. And, besides also being really delicious (it tastes like the dark meat of chicken), it also yields duck fat. Duck fat is a fat that can be cooked in; it’s a liquid at room temperature, it is less bad for you than butter, and it gives a light, smoky flavor to food that is cooked in it. In short, it is a miracle elixir of magical proportions in the kitchen.

Back to how easy duck is to prepare: the first time I made a roast duck, it was under the supervision of a close foodie-friend of mine, Wilco. Whenever I was got insecure that I was doing something that was going to ruin the duck, I’d ask Wilco. Wilco always responded the same way “The worst that can happen is you’re going to have a roast duck.” And that is pretty much true. If you cook the duck too long, yeah, the meat might be a little tougher but the skin will be all the crispier. If your rub isn’t flavorful enough, you can always add more salt once it’s cooked. Trust me, a duck is one of the easiest things you can make but it sounds so fancy that it will impress people. AND it tastes great. What more could you want from dinner?

My favorite rub is a barbecue-style rub; it is salty and smoky and sweet and spicy.

Crispy BBQ Duck

Ingredients  

  • 1 whole duck, 5.5 to 6 lbs
  • ½ white onion
  • 5 cloves garlic, whole and peeled
  • 1 cup boiling water

Spice rub

  • Butt rub
  • Brown sugar
  • Spanish paprika
  • Cayenne pepper
  • Garlic powder
  • Italian herb seasoning
  • Salt and pepper

 Directions:

1) Preheat oven to 350 degrees.

2) Remove duck from packaging; drain blood and check to make sure there is nothing inside the duck (like the duck’s organs in a bag).

3) Using a knife, score the duck skin or poke shallow holes into the skin; make sure you get all over the duck, both sides.

4) Pour 1 cup boiling water all duck.

5) Mix up seasoning in bowl; adjust quantities to taste.

Rub seasoning all over duck, making sure to get every part.

6) Shove onion and garlic cloves inside the duck; place duck on broiler pan in oven.

7) Cook for 2-3 hours, depending on the size of the duck (2 hours for a 4.5-5 lb duck; 3 hours for a 6.5-7 lb duck). Turn the duck in the oven every half hour. Duck is done when skin is brown and crispy and juices run clear.

 Pouring boiling water over the duck after it’s been scored loosens up the fat under the skin of the duck. When the duck roasts, the fat melts off making the skin crispy (and creating quantities of  wonderful duck fat).

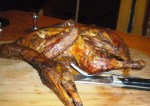
Our duck really was whole this time: head and feet included! You can get frozen duck at the grocery store; these will likely have head/neck and feet removed. Or you can buy refrigerated ready-to-cook duck from an Asian supermarket; this duck will more likely have head/neck and/or feet still attached. It is just a matter of preference. For me, I prefer being able to eat the whole duck; the meat on duck feet is delicious and extra crispy.

We bought ¾ lb of scallops at our local Asian supermarket. They were very fresh: large, white, very round.

 Bacon scallops with butter sauce

Adapted from a recipe at http://www.spotsfordates.com/07/2008/recipes/bacon-scallops-with-butter-sauce-recipe

Ingredients:

  • 8 sea scallops
  • 8 slices of bacon
  • 2 tbsp butter
  • 1 tbsp white wine (or sub for a mixture of light beer and white vinegar)
  • ½ tbsp lemon juice
  • Salt and pepper
  • Tooth Picks

Directions:

1) Start by making sure that your scallops are completely dry: set the on paper towels to drain and blot the tops with another paper towel.

2)  While the scallops are drying, cook up the bacon; cook the same number of slices as you have scallops. Blot grease off bacon and set aside.

3) When the scallops are dry, season both sides with a little bit of salt and pepper.

4) Put 2 tbsp butter in a different frying pan over medium high heat.

5) When the butter has started to bubble, add the white wine (or beer/vinegar) and lemon juice.

6) Add scallops to pan and cook 3-4 minutes per side; remove from pan to a plate.

7) Cut bacon strips in half; to plate, slide one slice bacon (2 halves) onto a toothpick. Stick a toothpick with bacon onto a scallop. Pour butter-wine sauce over all scallops onto the plate; serve immediately.

I made the bacon-scallops this way rather than the “traditional” method (wrapping uncooked bacon around raw scallops and cooking them in the oven) to ensure that the bacon was crispy and the scallops weren’t overcooked. And it worked great! The scallops were very juicy and the chewy, saltiness of the bacon complimented them nicely. Also, this whole recipe took about 15 minutes start to finish and again, looked fancier than it really was. Double bonus.

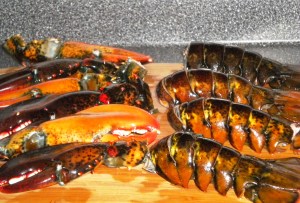
The other two things we made were boiled shrimp and lobster tails and claws. Unfortunately the quality of the seafood was bad in this case—the seafood was frozen when we bought it and it suffered from freezer burn. The recipe is still solid so I’m going to post it, but I recommend using fresh seafood.

Seafood boil with butter

Ingredients:

  • 1 lb shrimp
  • 3 lbs lobster claws and tails
  • 3 tbsp Old Bay seasoning
  • 1 tbsp white vinegar
  • Large pot
  • Garlic butter (1 clove garlic, chopped mixed into 2 tbsp melted butter)
  • Lemon butter (2 tsp lemon juice mixed into 2 tbsp melted butter)

Directions:

1) Heat up a lot of water in a huge pot; add Old Bay and vinegar.

2) Once the water is boiling, add seafood; cover and cook 5-7 minutes or until shrimp is pink and lobster is bright red.

3) Serve with garlic butter and lemon butter.

And so we feasted! And it was glorious.

Playing catch-up!

Standard

I have gotten quite behind on posting and a lot of my recipes fell to the wayside, so today is catch-up day. There are a lot of recipes, so bear with me. For my vegetarian readers, I am trying to make this blog more vegetarian friendly so look for the stars (***) under each recipe for my recommended alterations to make the recipe veg-friendly. I have to admit, I haven’t cooked a ton of vegetarian food so please comment and add your suggestions for veg-friendly swaps.

And now…away we go!

During the last week, The Boyfriend and I bought ingredients to make Thai basil chicken. This recipe was great for a couple of reasons: The Boyfriend and I are notorious for not eating leftovers so the fact that this recipe made just enough for 2 was great. The only problem with that was that it was so delicious! We enjoyed it so much that we wound up making it three times in a week! This recipe was easy and quick and I could eat it again this week in a heartbeat.

Thai Basil Chicken Recipe
Adapted from a recipe at Gimme Some Oven

Ingredients:

  • 2 tbsp vegetable oil
  • 5 cloves garlic, minced
  • 2 tbsp Sriracha hot sauce
  • 1 white onion, chopped
  • 10 oz boneless skinless chicken breast, chopped into bite-sized pieces
  • 1 ½ tbsp fish sauce
  • 1 tbsp soy sauce
  • 2 tsp brown sugar
  • 1 big bunch basil leaves, stems removed and leaves chopped
  • 1-2 tsp dried mint
  • 2 dashes ground white pepper

Directions:

1) Heat a wok or a heavy skillet over medium high heat until very hot.

2) Add the oil and garlic and stir fry until the garlic is very fragrant, about 30 seconds.

3) Add the onion and Sriracha and continue stir-frying until the onions have wilted, about 5 minutes.

4) Add the chopped chicken and fry until the chicken is cooked, about 5-7 minutes.

5) Stir in the fish sauce, soy sauce, brown sugar and white pepper; continue cooking until most of the liquid is gone.

6) Add the basil and toss a couple of time until the leaves are wilted and bright green. Serve immediately.

We used regular basil and dried mint instead of Thai basil, partially because we found beautiful basil at the farmers’ market and partially because The Boyfriend and I both find Thai basil a bit too strong in flavor for our tastes.

Lovely green basil from the farmers’ market!

***I’m not sure what you could sub the chicken for here to make it tasty but still vegetarian friendly; maybe extra-firm tofu that’s been marinating in a teriyaki sauce? Or perhaps portobello cap that has been sliced?***

We served it with jasmine rice. We have been without a rice cooker for a few months now and because of that, we’ve been laying off of the rice.

Chicken over rice

But since I discovered a (nearly) foolproof way to make jasmine rice on the stove, we have been eating a ton of it.

Jasmine Rice

Ingredients:

  • 1 cup jasmine rice
  • 1 ½ cup water

Directions:

1) Rinse rice in a colander until water runs clear; drain.

2) Add rice and water to a pot; cover.

3) Cook on high until water starts to boil; turn down to simmer and cook covered and undisturbed for 15 minutes.

4) Move pot off of hot burner; let rest for 5 minutes. Uncover and fluff with fork.

After repeated rice-making-fails, this one is a winner. I think we have made it successfully 5 times in the last 10 days. Yay!

Ok, another recipe from last week: chili rellenos. Since our deep-fryer is currently empty, we decided to take the opportunity to healthify the recipe by grilling the peppers. I sort of hodge-podged together two different recipes and the result was a success. Let’s start with ranchero sauce:

Ranchero Sauce

Adapted from a recipe at Closet Cooking

Ingredients:

  • 14 oz can diced tomatoes
  • ½ small onion (diced)
  • 4 cloves garlic (chopped)
  • ½ jalapeno (seeded and diced)
  • 1small handful cilantro (chopped)
  • 2 tablespoons olive oil
  • ¼ cup chicken broth
  • 1 teaspoon cumin
  • salt and pepper to taste

Directions:
1. Puree the tomatoes, onion, garlic, jalapeno and cilantro in a food processor.
2. Heat the oil in a pan.
3. Add the tomato mixture, chicken broth and cumin and season with salt and pepper.
4. Bring to a boil and simmer until it thickens, about 10 minutes.

Healthier Grilled Chili Rellenos

Adapted from a recipe at Once Upon a Plate

Ingredients:

  • 4 good-sized poblano pepper
  • 4 oz good quality mozzarella cheese + a small handful shredded cheese
  • Olive oil
  • Toothpicks

Directions:

1) Wash poblanos.

2) Optional: roast poblano peppers in the oven at 400 degrees for 5-10 minutes or until lightly blackened. Place peppers in Ziploc bag and let sweat for 5 minutes; after sweating, carefully peel peppers.

3) Slice stem/cap almost all of the way off of the pepper; flip back stem/cap to remove seeds and membrane.

4) Cut mozzarella into 1 oz chunks that are the size of pepper and stuff cheese into pepper.

5) Secure stem/cap with toothpicks, 2-3 toothpicks per pepper.

6) Brush poblano peppers lightly with olive oil and cook on hot grill; cook 2-3 minutes per side for roasted pepper or 5-8 minutes per side for raw peppers.

7) Optional: Put peppers in a casserole dish; cover with ranchero sauce and shredded cheese. Bake at 350 degrees for 5-10 minutes or until cheese is melted.

This was really tasty. We cut a few corners on our recipe (we didn’t roast the peppers or bake them with the sauce and cheese) but we thought that the recipe would have been even tastier had we not cut any corners; I put both options in the recipe so you can choose your route.

Empty plate = happy tummy!

We served it with a redo of the corn and black bean salad from a few weeks ago and our beer margaritas.

For my lunch last week, I decided to make dumplings. Again, I cobbled together a few recipes and they came out pretty good.

Chicken Dumplings

Adapted from a recipe at Weekend Food Projects

Ingredients:

  • 1 pound ground chicken
  • 4 cloves of garlic, finely chopped
  • 1 medium sized onion, finely chopped
  • 1 tablespoon fish sauce
  • 1 tablespoon sriracha
  • 1 teaspoon freshly ground black pepper
  • 1 teaspoon coarse kosher salt
  • 1 package dumpling wrappers

Directions:

1) Mix all the ingredients in medium bowl and refrigerate for one hour.

2) Use a teaspoon to measure the amount of mixture. Place the filling into the center of the dumpling wrapper and wrap or just seal.

To cook:

1) Place a non-stick pan on medium-high heat with two tablespoons of vegetable oil.

2) Place the dumplings in the pan in a single layer; cook dumplings until the bottoms are brown. Flip dumplings so that all sides get brown.

3) Add about 1/4 cup of water to the pan and cover the pan with a lid and let it cook for three to four minutes. Once the water has evaporated, your dumplings are done.

OR:

1) Steam dumplings in well-greased steamer for 5-6 minutes.

I found a great technique for folding dumplings on Fuss Free Cooking: there are step-by-step instructions with pictures! I still had to have The Boyfriend demonstrate the folding technique; he was really good at it! Mine all came out a little lumpy but his were really nice looking.

I folded one just intuitively

and then one where I used a fork to seal the edges

before I succumbed to the “normal” technique.

That’s mine in the front and The Boyfriend’s in the background. His is much more symmetrical than mine. Luckily they all cook up the same 🙂

Eventually we figured out where I was going wrong so my last two dumplings came out okay, haha.

We made so many!

I made a batch of about 50 of them and froze them in bags of five. If you steam them from frozen, add an extra minute or two to make sure that they are done.

***If you wanted to make these vegetarian, I bet you could sub crumbled TVP or chopped tofu (or even sweet potatoes, if you wanted to get creative) for the chicken; and if you added extra veggies and herbs to the filling (chopped carrots, fresh ginger, etc) they would be quite tasty. Hmm, maybe I’ll have to try that now…***

I also made some summer rolls and while they were good, the recipe wasn’t good enough to brag out. I do think that I rolled them nicely so I am going to photo-brag about that! Haha.

Bam! Pretty summer rolls.

They had cucumber, avocado, and crab-stick in them, in case you were curious.

***Replacing the crab stick with marinated tofu, sweet potaotes, or any number of veggies makes it veg-friendly!***

More recipes! The Boyfriend’s birthday was a while back so we had a small get-together at our house. I made some great party dips for the revelers and even though I don’t have any pictures (it was so hectic, sorry!) I wanted to post the recipes because they were really delicious.

Best fresh salsa

Adapted from a recipe at Kayotic

Ingredients:

  • 14 oz can diced tomatoes
  • 1 medium shallot
  • 1 medium roma tomato
  • About 10 slices of pickled jalapenos
  • 2 garlic clove
  • Handful of cilantro
  • Juice of 1/2 a lime
  • Ground cumin
  • Salt
  • Pinch of sugar

Directions:

1) Coarsely chop shallot, garlic, and tomato; add to a food processor or mini chopper.
2) Add the salt, a pinch of sugar to cut the acidity of the tomatoes and the ground cumin.
3) Pour in the diced tomatoes; squeeze in the fresh lime juice and add the cilantro.
4) Blend until it reaches desired consistency.

The Boyfriend and I have made a lot of salsa but we have never found a recipe that stuck…until now! We are in LOVE with this recipe! The color was beautiful and the flavor was outstanding: spicy and fresh. The pinch of sugar did cut the acidity which was wonderful. I blended it until it had the consistency of restaurant salsa and it tasted as good as anything I’ve had in a restaurant (and better than some that I have had!).

When we were choosing dips to make, we wanted to keep costs low so we chose dips that could all be eaten with tortilla chips and that would complement each other. I wanted to make something with avocados that would keep longer than guacamole and when I stumbled upon this recipe, I decided to give it a try. It was pretty good: creamy and spiced and different. Mmm…

Hank’s Tomatillo-Avocado Dip

Adapted from a recipe by Hungry Texan

Ingredients:

  • 1 poblano pepper
  • ½ white onion
  • 1 large can tomatillos, drained
  • 1 Serrano pepper
  • 1 jalapeño
  • 4 Hess avocados
  • Juice from 2 limes

Directions:
1) Roast the poblano, onion, Serrano, and jalapeño in a 400 degree oven for about 20 minutes.

2) Peel the poblano, stem and de-seed the Serrano and jalapenos.

3) Add all of the ingredients to the food processor and run until smooth and creamy.

4) Season to taste with salt and a bit of garlic salt.

The last dip was the crowd-favorite for the day. Since this was the first year in a few that we didn’t do a seafood boil for The Boyfriend’s birthday, I decided to incorporate seafood in a dip. As is the theme for this post it seems, I combined a recipe for crab dip that I found online with an artichoke dip recipe that my college advisor used to bring into class. The result was a hit!

Creamy Stovetop Crab Dip

Adapted from a recipe at Annies Eats
Ingredients:

  • 1 tbsp olive oil
  • ½ white onion, minced
  • 2 green onions, chopped
  • 12 oz. canned lump crab meat
  • 8 oz. cream cheese, at room temperature
  • ½ cup light mayonnaise
  • 8 oz can water chestnuts, drained
  • 14 oz canned artichoke hearts, drained and chopped
  • ½ cup bread crumbs
  • ½ tsp Worcestershire sauce
  • 1 tsp lemon juice
  • 1 tbsp Sriracha
  • Paprika
  • Salt and freshly ground black pepper, to taste

Directions:
1) Preheat oven to 350 degrees. Heat the olive oil in a large skillet over medium-high heat; add the onion and sauté until tender, about 7 minutes.

2) Add the crab meat to the pan, including the juices in the can. Stir in the cream cheese, Worcestershire sauce, lemon juice, green onions, mayonnaise, Sriracha, water chestnuts and artichoke hearts; cook over medium heat for about 5 minutes, until all the ingredients are warmed through Season with salt and pepper.

3) Spoon mixture into a casserole dish and sprinkle paprika on top. Top mixture with breadcrumbs and pop in the oven for 7 minutes or until breadcrumbs are browned. Serve with warm bread or tortilla chips.

***You could just omit the crab here to make a vegetarian-friendly artichoke dip, if you like. Adding mushrooms to it would give it another nice texture, to replace the texture lost when the crab is removed.***

Ok, I think that wraps up this recipe roundup. I have more recipes from this week that I am going to try to get out in a timely manner so keep an eye here for that. I’m also joining our local grocery co-op tomorrow so I’ll have an update on that and what it is like to shop there!

Amaretto days and Star Trek nights

Standard
Amaretto days and Star Trek nights

So I’m just going to jump right into the recipes this time!

Amaretto Chicken

Adapted from a recipe at Lol Foodie

Ingredients:

  • 3 boneless, skinless chicken breasts
  • 2-3 tbsp goat cheese, at room temperature
  • 3 thin slices of prosciutto
  • 2 tbsp butter
  • 6 ounces mushrooms, sliced
  • 1/3 cup flour
  • 3 tbsp peanut oil
  • ¾ cup chicken stock
  • 1/8 cup Amaretto liqueur
  • Salt and pepper

Directions:

1) Start by pounding out the chicken breasts. Place a breast in a large Ziploc bag; using a meat hammer (or regular hammer). Pound the chicken until it is very thin, about 1/8″ thick; repeat with other 2 chicken breasts.

2) Season both sides of your chicken with salt and pepper.

3) Spread each chicken breast half with a little less than 1 tbsp of the softened goat cheese. Top with 1 slice of the prosciutto.

4) Roll the chicken into a tight cylinder; tie with kitchen twine. Dredge each chicken “roll” in flour.

5) Melt 1 tbsp of butter over medium-high heat in a skillet (don’t use nonstick).

6) Add the mushrooms; cook until softened, about 5 minutes. Remove the mushrooms to a plate, and set aside.

7) Add the remaining butter and peanut oil to the skillet (still over medium-high). Once melted, add in the chicken rolls.

8) Cook for about 4 minutes on each side, turning 4 times, for a total of 16 minutes. Remove the chicken to the plate with mushrooms.

9) Add the chicken broth to the skillet; being careful about a flare-up, add the Amaretto.

10) Bring the sauce up to a boil, and stir/scrape to deglaze all the bits from the bottom of the pan. Simmer for 5 minutes, or until the sauce has reduced by a third.

11) Return the chicken and mushrooms to the skillet, turning to coat in the sauce and heating through.

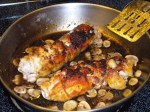
No step-by-step pictures again—I’m sorry. But Lol Foodie has wonderful photos that accompany the recipe; if you need help, refer to the original recipe. And ok, yeah, I know this doesn’t sound too healthy: there is liqueur and goat cheese and prosciutto involved for goodness sake! I did modify a few things from the original recipe in the name of health: I decreased the amount of goat cheese (which I would usually frown upon); increased the amount of chicken in the equation (from half a breast to one whole breast per “roll”); and I traded some of the butter for olive oil. In addition, I limited myself to half of a “roll” with my large salad and side of carrots. In other words, it could have been a lot worse.

Did I mention that this was delicious? It was: the outside was so brown and crispy; the inside was moist chicken and creamy goat cheese and smoky, salty prosciutto.

Basil carrots

Adapted from a recipe by Jason and Shawnda

Ingredients:

  • 1 lb whole carrots
  • 2 tbsp olive oil
  • 1 tbsp fresh basil, chopped
  • Salt and pepper
  • Optional: feta cheese

Directions:

1) Preheat oven to 400 degrees.

2) Peel the carrots and halve lengthwise.

3) Toss with olive oil, salt, pepper, and basil.

4) Cover baking sheet with aluminum foil; spread carrots on the baking sheet and cover with more foil.

5) Roast for 40 minutes.

6) If desired, add feta cheese to top of carrots before serving.

These were tasty! I decided to roast them the way that I normally do rather than the method suggested in the original recipe. The recipe also suggested thyme, which I didn’t have, so I happily substituted the fresh basil I had on hand.

When I pulled the carrots out of the oven, I thought at first that I had burned them; the ends were black and slightly charred looking. I happily found out that the suspicious black pieces of carrot were just caramelized; they had a great chewy texture and a nice sweet and smoky flavor.

The next day (Sunday) was Star Trek night at our friends’ home; these friends started the weekly tradition and so every Sunday we travel to their house to watch, drink, and watch Captains Kirk, Picard, Sisko, Janeway and Archer traverse space and battle foes. I’ve never been a Trekkie but I’m finding that I enjoy Star Trek the more that I watch of it.

Anyway, I really wanted to bring something to our latest gathering because our friends are so nice to host us every week and they usually have snacks and booze for us. And that bring us to snacks! You might see a repeat of a few ingredients from other recipes I used this week and that’s because I like to use what I have in the fridge and cupboards as much as I can; that’s also why I have so many adaptations to recipes that I found online.

Roasted Garlic

Adapted from a recipe at Life’s Ambrosia

Ingredients:

  • 1 bulb (or head) garlic
  • 1 tbsp butter
  • 1 tsp lemon juice
  • Salt

Directions:

1) Preheat oven to 400 degrees.

2) Cut ¼ inch off the top of the bulb of garlic to expose the cloves beneath; do not peel the garlic: you want to roast it in the skin.

3) Place bulb on a piece of aluminum foil; place butter on top of bulb, pour lemon juice over the garlic and sprinkle with salt.

4) Bring up all sides of aluminum foil and twist together to close.

5) Cook for 60 minutes or until garlic cloves are soft and golden in color. Allow to cool.

6) To eat, remove garlic cloves with a fork and spread on top of French bread or good crackers.

If you have never eaten roasted garlic, you are missing out. The flavor is milder, sweeter, and deeper than that of raw or sautéed garlic. It is fantastic with in pasta or on poultry or steak; it is just as great with a nice cheese on a great piece of bread. Seriously, make some now. You won’t regret it.

The next recipe comes from a novel. I recently finished ready Signora da Vinci by Robin Maxwell; the book is a fictionalized account of Leonardo da Vinci’s mother, Caterina. It is a really enthralling read and it is very well-written. In it, the character Caterina da Vinci often makes a compote that her aunt taught her to make. “Compote” is French for mixture but it seems to usually mean a mixture of either fruits or meats cooked on a low temperature for a long time; the result is that the meat or fruit breaks down and the flavors of the dish combine. This particular compote is made with olives and grapes and fresh herbs. Yes, I am aware of how unusual this combination sounds; The Boyfriend was quite vocal in his doubts as well, and to be honest I was a little unsure of how the flavors would combine. Well all of the doubts were for naught as the compote was delicious and well-received by everyone at Star Trek night.

Grape and Olive Compote

Adapted from a recipe by Robin Maxwell

Ingredients:

  • 1 jar Kalamata olives, pits removed
  • Equal amount red seedless grapes + 3 tbsp
  • 3 tablespoons balsamic vinegar
  • 3 tablespoons extra virgin olive oil
  • 1 tablespoon fresh chopped herb (thyme, basil, or rosemary)

Directions:

1) Mix all ingredients in an ovenproof dish and bake uncovered for one hour at 350 degrees, turning the fruit every 15 minutes with a spoon to recoat them with the oil and vinegar.

2) Serve warm or cold with soft goat cheese on crusty bread or with crackers, or use as a side dish with fish or poultry.

My total snack spread wound up being goat cheese, a bulb of roasted garlic, the olive-grape compote, some slices of Muenster and Habanero cheddar cheeses, pan-fried prosciutto, and a loaf of sliced Italian bread. I’m big on bread and cheese so I was quite content with the finished product; and yes, this was my dinner for the evening, haha.

Ok, so end-of-blog question time: what is your favorite food/recipe to bring to a party?