Category Archives: DIY

Quick update and an easy recipe

Standard

Update! My job interviews went well; that’s right interviews. I got a phone call that turned into a phone interview right after I got home from my first interviews. Fingers crossed that one of these turns into a full-time position for me!

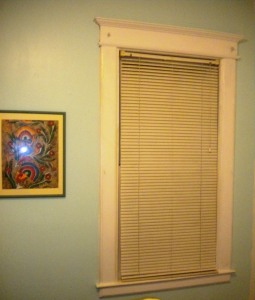
In celebration of two successful interviews, The Boyfriend and I hit Home Depot again to pick up some curtain rods; tonight I will say good-bye to ugly bedroom blinds and a stupid closet door and hello to pretty bedroom curtains! Yay!

 Ugly blinds before

Pretty curtain after!

Space-wasting closet door before

Pretty new closet curtain after!

 Ok, quick recipe time! I bought some delicious blue cheese (mmm) at our local co-op and after nom-ing on a small snack of Miss Vickie’s jalapeno potato chips and blue cheese, I decided to make dinner. I had 2 goals for dinner tonight: I needed dinner to be easy and I also wanted to clean out the fridge of leftovers. Voila! Miracle chicken was born (I called it Miracle because it tasted too good to be so easy).

 Miracle Chicken  

Ingredients:

  • 1 chicken breast, seasoned and cooked
  • 4 oz mushrooms
  • ½ white onion
  • 3 cloves garlic
  • 1 oz blue cheese
  • 2 tbsp olive oil
  • 2 tsp balsamic vinegar
  • 2 tbsp seasoned bread crumbs
  • Salt and pepper, to taste

 Directions:

1) Chop up the garlic and onion; wash and dry mushrooms.

2) Heat olive oil in skillet over medium-high heat; add garlic, onion, and mushrooms. Salt and pepper the mixture and sauté for 5-7 minutes.

3) Add balsamic vinegar to skillet and cook mushroom mixture for another minute or until brown and slightly crunchy; remove from skillet.

4) Butterfly cooked chicken breast; spoon mushroom mixture over the chicken breast. Top with blue cheese and breadcrumbs.

5) Broil chicken for 2-3 minutes or until cheese is melted and breadcrumbs are browned. Eat ½ of the portion and serve with a giant salad to assuage the guilt.

 No pictures, sorry; I ate it too fast! This was delicious. And decadent. And easy. And I didn’t feel that it was too bad for me since I only ate a small portion. If you’re nervous about blue cheese, I urge you to try it; yeah, it has a strong smell and is kind of gross if you think about the fact that it’s moldy but it’s also creamy and unctuous and it can really be the belle of the ball in a dish like this. I guess if you have a strong aversion to blue cheese, you could probably swap the blue for goat cheese, but I really recommend the blue.

‘K, that’s it for tonight. New tradition: Question of the Blog! Tonight’s question: what is your favorite cheese? I think I need to work on my question-asking skills…

Spicy food for a spicy day!

Standard
Spicy food for a spicy day!

Today has been pretty great, spicy in fact. I have 3 exciting pieces of news to share!

  1. The future
  2.  Home improvements
  3. Welcome home

Ok, so first up something exciting about The Future. That sounds nicely cryptic, right? Well I won’t keep you in suspense any longer—I have a job interview tomorrow! I won’t tell you where because I don’t want to jinx it but fingers crossed that I get hired!!

Number 2 (ha!): home improvements. I’m sure that I mentioned that The Boyfriend and I have a laundry list of things we want to do to our new place (and if I didn’t, I’m mentioning it now). Seeing as neither one of us have an income right now, we have to tackle our “honey-do list” slowly (aka inexpensively). Today we hit up our local Home Depot and spent about $25 picking up supplies to work on 2 projects. The first project is putting in shelves in our common closet! Our apartment really doesn’t have a common closet so The Boyfriend and I made one out of one of the pantries in our kitchen. Fortunately, it is a nice big closet; it used to house our refrigerator! Unfortunately, it requires a bit of work before it can be an efficient closet; we’ve already taken the door off of its hinges and now we just need to put up a few shelves and a curtain rod + curtain. First step, putting up a shelf! It cost about $12 for the entire project: 1 piece of wood (3/4” x 11” x 48”), 2 brackets (we opted for the fancy ones so we could also install a hanging bar), and some screws (we bought a pack up 10 for $1.00; #8 x 1” flathead). I won’t take credit for this project—The Boyfriend screwed the brackets to the wall and then to the shelf and mounted the whole thing. I think it took him about 30 minutes and he said his hand was sore when he was done but that it was worth it.

I probably should have documented the process better (and I will in the future!) but I just thought of adding my home improvements to the blog like 5 minutes ago. However, I do have an old before picture and a new after picture that I can share!

Before:

After:

Bam!

The second home improvement task that we accomplished today was the creation of an ‘Art While You Fart’ set-up in our bathroom. AWYF is something that I first saw at a burn (more about those later); at the burn, it was a poster board hung inside the port-o-johns with a marker attached. In another joint venture, I noticed the perfect “chalkboard-like” space to the left of our toilet and The Boyfriend spray-painted it with chalkboard paint. Bam! Instant art…while you fart. The only thing left for that is installing a chalk shelf and buying chalk. I’ll post a picture of the AWYF space as soon as there is some art on it!

Ok, last update and then recipes, I promise! Maybe you’re wondering what the “welcome home” means. Well even if you’re not, I’m going to tell you. The Boyfriend and I (along with a good group of friends) bought our tickets for Playa del Fuego tonight! Playa del Fuego (PDF) is a northeast regional Burning Man event. I could try to explain what burns are but I think I’ll let the wiki page do it for me. PDF is a smaller (1200 people compared to BM’s 50,000) regional burn that happens in Delaware in May and October. It will be my fifth burn but my first time at PDF. I am beyond excited! The “welcome home” title refers to the greeting (+ a hug!) that every single person gets when they get to a burn; virgin burners (first-time burners) also traditionally get paddled.

It’s going to good to go home in October; even better will be the reunion at Afterburn* in November.

*AB is a Florida burn. It was my second burn and is still my favorite of the burns that I have been to. Seeing all of our best friends is a pretty great incentive for The Boyfriend and I to make the 1200 mile journey.

Ok, now what you’re really here for: food! With all of the excitement of today, I didn’t have a ton of time to spend on dinner. Nevertheless, it was a solidly tasty effort with very little effort expanded on my part!

Sriracha Chicken

Adapted from a recipe at Whisk Kid

Ingredients:

  • 2 chicken breasts
  • 2 tbsp chopped cilantro
  • 3 tbsp chopped onion
  • 3 garlic cloves, peeled
  • 2 tbsp Sriracha, more or less to taste
  • 2 tbsp hoisin sauce
  • 2 tbsp olive oil
  • 1 tbsp lemon juice salt and pepper to taste

Directions:

1) Place the chicken in Ziploc bag; set aside.

2) Add the rest of the ingredients to a food processor (or in my case, a Magic Bullet) and blend until completely combined. Add marinade to plastic bag and refrigerate for at least 3 hours or overnight.

3) Preheat the oven to 350F; cook the chicken, uncovered, for 20-30 minutes until cooked through.

A wee bit blurry…

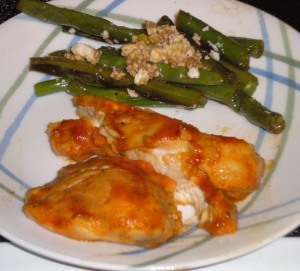
For being so easy, the chicken was really tasty. The Boyfriend said “It tastes like actually good Chinese food” so I guess that was a compliment, as well as a testament to the fact that making this wasn’t much harder than ordering take-out.

Balsamic green beans with feta

Adapted from a recipe at Chinese Grandma

Ingredients:

  • 1 lb green beans
  • 2 tbsp olive oil
  • 1/4 cup water
  • 1-2 tbsp balsamic vinegar
  • 2 tbsp feta cheese
  • Salt and pepper, to taste

Directions:

1) Snap ends off green beans and rinse; pat dry.

2) Heat a skillet large enough to hold the beans comfortably; add olive oil.

3) Add green beans to skillet but be prepared for a lot of popping oil. Be careful!

4) Using long tongs, stir the green beans around the pan making sure that they all get covered in oil. Turn the temperature to medium low and cover pan.

5) When the popping has subsided, take the cover off and stir beans again; they should be turning bright green.

6) Add a ¼ cup of water to the pan and cover; cook for 1 minute or until beans are at preferred doneness.

7) Drain excess water from pan; add salt and pepper to taste.

8) Remove beans from skillet; drizzle with balsamic vinegar and sprinkle with crumbled feta.
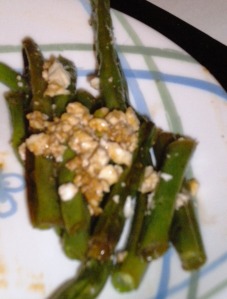
I’m sold on anything that has feta cheese but in general, these green beans were pretty great. Very easy, very healthy, and a nice change from our normal butter-and-garlic-sauteed green beans.
I bet you’re exhausted reading a post this long (and it IS pretty late at night too), so I’ll just say goodnight for now but I do have one question for the evening: what do you think of Art While You Fart? Totally awesome or so weird?


DIY and a few left-over recipes

Standard
DIY and a few left-over recipes

Sometime in the last week or two amidst all of the cooking and then posting, I forgot to post a recipe, a solid, healthy, easy recipe. Since tonight was a no-brainer meal not really worthy of posting the recipes for (spaghetti; roasted squash; salad; and yes ok, we had garlic bread), I figured that now would be a good time to catch up on what I missed.

Cilantro Lime Shrimp

Adapted from a recipe at Lana’s Cooking

Ingredients:

  • 1 tbsp butter
  • 1 tbsp olive oil
  • 4 cloves garlic, minced
  • ½ medium onion, chopped
  • 1 jalapeno, chopped
  • ¼ tsp red pepper flakes
  • 1 tsp cumin
  • 1 tsp chili powder
  • 2 roma tomatoes, chopped
  • Juice of 1 lime
  • Salt and pepper, to taste
  • 1 pound shrimp, split and deveined 2 tbsp chopped cilantro

Directions:

1) Melt the butter and oil in a heavy skillet over medium-high heat.

2) Add the garlic, onion and jalapeno. Cook, stirring until the onion begins to wilt, approximately 3 minutes.

3) Add the red pepper, chili powder, and cumin. Continue cooking until the onion becomes translucent, approximately 3 additional minutes.

4) Add the tomatoes. Cook, stirring occasionally, until the tomatoes are soft.

5) Add the shrimp, zest and lime juice, salt and black pepper.

6) Cook until the shrimp are just opaque. Remove the pan from the heat and stir in the cilantro

Black Bean, Corn and Avocado Salad Recipe

Adapted from a recipe at Eclectic Recipes

Ingredients

  • 1 can black beans, rinsed and drained
  • 1 can corn, rinsed and drained
  • 2 avocados, diced
  • 1/2 red onion, diced
  • 1 tomato, diced
  • the juice of 1 lime
  • 2 tablespoons olive oil
  • 1/2 teaspoon cumin
  • salt and pepper to taste

Directions:

1) Add all diced vegetables except avocado to a large bowl.

2) Add lime juice, olive oil, cumin, salt and pepper. Mix well to combine. Refrigerate until ready to serve. Add avocado right before serving. Serve over salad greens.

I recommend NOT chopping all of the avocado at once unless you intend on the salad being eaten in one sitting. I just chopped and added the avocado to the salad on the days that I ate it so that I had unspoiled avocado for leftovers.

I haven’t done a ton of cooking in the past few days but I did do some DIY beauty stuff! After a pretty exhausting and frustrating day, I decided that I needed a bath to unwind. I really wanted a bubble bath and my friend, Mrs. H, was chatting to me about DIY-beauty products and one thing led to another and…

Foaming Vanilla-Honey Bath

From Pink of Perfection

Ingredients:

  • 1 cup light oil (almond, sunflower, or canola)
  • ½ cup honey
  • ½ cup mild liquid hand or body soap 1 tablespoon vanilla extract.

Directions:

1) Mix ingredients together in a glass jar. To use, shake gently to remix and pour ¼ cup under running bath water.

Word to the wise: if you don’t have any of the light oil, you can use olive oil; that’s probably not recommended but that’s what I did and it didn’t smell weird or feel funky or anything. I also used Sweet Pea body wash from Bath and Body Works as my soap and that worked out alright. It smelled pretty good and felt nice on my skin.

I have dry skin and don’t have the money to fork over for special, intense moisturizers. However I did have all (really, both) ingredients for an at-home moisturizing mask!

Avocado Mask for Dry Skin

From Pink of Perfection

Ingredients:

  • ½ avocado
  • ¼ cup honey

Directions:

1) Mash the avocado in a bowl, then stir in honey.

2) Apply to skin and leave for 10 minutes, then rinse.

Pros and cons of the mask:

Pros:

  • It tastes good
  • Simple ingredients
  • It made my skin super soft and awesome afterwards

Cons:

  • It was a little (ok, quite) slimy
  • It is really hard to get off of your face.Be prepared for lots of washing
  • The recipe makes enough for 2 masks, so I felt bad about wasting half of it (you should just invite a friend over!)

Overall, I really liked the mask. It definitely made a difference in how my skin felt, for the day and in the week since.

Also, as promised, I am doing better in the exercise department! I did my 30-minute Jillian Michael’s Yoga Meltdown DVD yesterday and then tonight I went on a 30-minute brisk walk with The Boyfriend. I want to get to a place where I am able to do an intense workout EVERY day but right now things just seem to come up that prevent that. Maybe once I get a job (will I ever??) and get on a routine it will be easier.

Oh! If you like DIY home products, you should check out Mrs. H’s blog! She is a newly-married lady exploring her housewife side. She is insanely creative with her DIYs and a lot of them are also really doable. Check her out! Until next time…