Tag Archives: beef

How not to make a bacon pinata

Standard

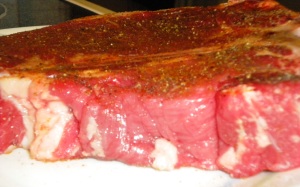
This is another meat-centric blog post: sorry vegetarians! This was a few days ago; it is probably what made me so eager to eschew red meat this week. T-bones were on sale this week so we bought 2 for the 3 of us; they totaled a little over 3 pounds!  Steak is one of my favorite meals, especially with the sear-it-and-bake-it method. This is another one that sounds a little strange, I know. Why would you bake a steak when you could grill it, right? Trust me. This is a delicious way to make a steak and it is impossible to overcook it if you follow the directions. The bacon and duck fat adds the smokiness that you would get from a grill and the cast iron provides a beautiful sear on the outside while retaining the juices from the steak.

  Best Steak

Ingredients:

  • T-bone steak
  • 1 tbsp duck fat
  • 1 tbsp bacon fat
  • Celery salt
  • Garlic powder
  • Black pepper

Directions:

1) Take steak out of refrigerator; season with celery salt and pepper and garlic powder. Let steak sit on counter until it warms up to room temperature, about 30 minutes.

2) Preheat oven to 400 degrees; heat both fats up in cast iron skillet over medium-high heat.

3) Cook steak for 1-2 minutes per side; put the skillet in the oven and cook about 7 minutes for a rare or medium-rare steak.

4) Remove the steak from the pan immediately; let steak rest on plate for 10 minutes before cutting into it.

Delicious steak and because it was so thick, it was beautifully rare. I cooked up some Yukon gold potatoes (my fave potato!), hasselback style.  

  Rosemary Hasselback Potatoes

Adapted from a recipe at http://theculinarychronicles.com/2011/06/17/rosemary-garlic-hasselback-potatoes/

Ingredients:

  • 4 medium-sized Yukon gold potatoes, washed and dried
  • ½ cup olive oil
  • About 10 large basil leaves, 4 whole and 6 torn in half
  • 4 garlic cloves, thinly sliced
  • Salt and pepper

Directions:

1) Place oil and the 6 torn basil leaves in a small saucepan and heat on medium-low for 8-10 minutes. Remove from heat and allow to cool to room temperature.

2) Preheat oven to 425 degrees. Place one potato on a wooden spoon on a cutting board. Starting from one end of the potato, make slits about 1/8 inch apart; cut all the way down to the sides of the wooden spoon but do not cut all the way through the bottom. Repeat with the remaining potatoes.

3) Carefully slip one slice of garlic in between every few segments of the potatoes until all the garlic has been evenly distributed.

4) Put one whole basil  leaf in the middle of each potato.

5) Place potatoes on a baking sheet and brush them all over with the basil infused oil; season with sea salt and pepper.

6) Bake the potatoes for 30-40 minutes, depending on size. Interior should be soft and exterior should be slightly crisp.

  I had never made hasselback potatoes before today but I have been eyeing them for some time. They always seemed too difficult though so I had avoided them; I was pleasantly surprised by how simple they were to make! Yeah, mine didn’t come out as pretty as they could have but they were still very tasty. We used the leftover potato and steak to make an epic steak sandwich (steak and potatoes and mushroom and onions and jalapenos and provolone on sourdough. Yum!). I am already dreaming about making these again and soon!

I made a twist on my favorite baked carrots for some color and nutrients.

Baked Carrots

Ingredients:

  • 10 oz whole carrots
  • 2 tbsp butter
  • 1/4 tsp paprika
  • 1/2 tsp curry powder
  • 1/4 tsp cayenne pepper
  • 1/4 tsp ginger
  • 1/4 tsp cumin
  • 1/2 tsp garlic powder
  • 1/8 tsp cinnamon
  • 2 tsp brown sugar
  • 1 tbsp olive oil
  • 2 garlic cloves, chopped
  • 1 oz feta cheese, crumbled
  • 2 tsp lemon juice

Directions:

1) Preheat oven to 400 degrees.

2) Mix all spices and chopped garlic into butter.

3) Put carrots on baking dish; spread mixture liberally all over carrots.

4) Cover baking sheet tightly with aluminum foil; bake for 40 minutes.

5) Remove foil; drizzle olive oil over carrots and bake for 10 more minutes.

6) Remove carrots from baking sheet; drizzle with lemon juice and top with feta cheese.


And what meal is complete without a drink? I drink a lot of water and I’m trying to not drink as much soda, so I’m always looking for healthier alternatives (remember my instant iced tea?).  So insert cranberry spritzer! Seltzer is calorie-free (I think) and cranberry juice is great for urinary health and is relatively low in sugar. Together with a bit of lime, it’s a drink that is refreshing and bubbly without being too sweet.

Cranberry Spritzer

Ingredients:

  • 5 oz seltzer water
  • 3-4 oz cranberry juice
  • lime slice

Directions:

1) Pour cranberry juice into tall glass; top with seltzer.

2) Squeeze lime slice into cup; drop lime into drink. Enjoy.

So, on a different note, remember those burns that I told you about in a previous post? Well, there is one in Delaware in October that I have been planning to go to for a few months now. I got my ticket, I have camping gear, and we have been planning some fun and kooky things to bring to the burn. Well, I just sold my ticket to a fellow burner who missed out because I am not going to be here to go to the burn in a few weeks. I am leaving sometime next week to go to Atlanta to stay with my mom; she broke her back 2 months ago after she got back home from taking a week off to move me in up here in NY. Sucky, right? So she is going to be receiving treatment at her clinic in Atlanta and I am going to be there helping her since her mobility is limited. So it’ll be goodbye to cold weather for now; I’m going to miss the changing of the leaves here and I might miss the first snow. My mom is awesome so I’m glad I’ll get to spend time with her; and I’ll be glad to be there just so she doesn’t have to do it alone. Anyway, I am going to get to go to a different burn in Atlanta the weekend after this one: Alchemy. Yay! So those burn projects we have been thinking about might not have to be put off after all. The Boyfriend and I decided to tackle one of those projects this week: a bacon piñata. We imagined covering a balloon in bacon-mache; when the mache dries, we can just pop the balloon and we’d have a hard outer bacon shell, just like when using paper mache. Sounds plausible, right? First problem: edible glue. I googled that and came up with Tylose powder. According to the internet, Tylose powder is a miracle elixir that you can make “glue” with. Glue problem solved. Now that we had glue and bacon, what other problems could arise, right? Ugh. Nothing went right, except that we wound up with 2 lbs of cooked bacon at the end of the project. The Tylose never set, the edible mache glue that I made was a thick goopy mess, and the simple syrup and the maple syrup just made everything sticky. And then The Boyfriend dropped the balloon on the table and everything fell off. Ugh. It was a mess. I decided to include the recipe in case you want to know how not to make a piñata.

 How not-to make a bacon piñata

Ingredients:

  • 2 lbs bacon
  • 1 balloon
  • 1 tsp Tylose powder
  • ½ cup warm water
  • Optional: ¼ cup simple syrup AND/OR ¼ cup maple syrup AND/OR ¼ cup edible mache glue


 Directions:

1) The night before you start your doomed enterprise, mix up your glue: add warm water to Tylose powder and refrigerate overnight. Don’t be alarmed if the powder does not dissolve instantly in the water; it will combine fully while it is sitting overnight.

2) When you’re ready to make a piñata, start by cooking your bacon. I recommend cooking it in the oven: it’s easy (for you) and it ensures that the bacon cooks as flat as possible. To cook in the oven: preheat oven to 400 degrees. Lay bacon strips on a roasting pan; cook bacon for 20 minutes.

You can make a “bacon weave”, if you think that will help the bacon stick to itself and the balloon; if you do that, flip the bacon weave halfway through cooking time.

3) While the bacon is cooking, blow up your balloon; it should be smaller than your head.

I recommend cleaning the balloon with some vinegar water prior to bacon application.

4) When the bacon is finished, remove from pan to a paper towel lined plate; blot bacon with another paper towel to remove grease.

5) To make piñata: apply Tylose glue to both sides of bacon strips or weave; sluice off excess.

6) Slap bacon onto balloon; use simple syrup/maple syrup/edible mache glue to help affix the bacon weave to the balloon. Hold bacon weave in place for about 30 minutes or until it seems reasonably dry. Remove your hands and watch in despair as the bacon weave slides off.

7) Put the bacon weave back on the roasting pan; add some seasonings to the top (cayenne pepper or chili powder or butt rub) and pop it back in the oven for 6-8 more minutes or until crispy.

8) Gorge on bacon until your belly bursts and celebrate your failed bacon piñata.

Because of the failure of the bacoñata, I have no pictures of the finsihed product 😦

Anyone out there have an idea on how to make a completely edible piñata?
A very green dinner

Standard

My last entry for Farmers’ Market week! This time our local ground beef was the star, with the fresh kale in a supporting role.

Asian-Style Lettuce Wraps

Adapted from a recipe at The Cynical Chef

Ingredients:

  • 16 butter lettuce leaves
  • 1 pound lean ground beef
  • 1 tablespoon olive oil
  • ½ large onion, chopped
  • 4 cloves fresh garlic, minced
  • 2 tbsp soy sauce
  • ½ cup hoisin sauce
  • 2 tbsp rice wine vinegar (or 2 tbsp white vinegar + 1 tsp lemon juice)
  • 1 (8 ounce) can sliced water chestnuts, drained and quartered
  • 1 bunch green onions, chopped
  • 4 teaspoons sesame oil
  • 4 oz mushrooms, chopped
  • ½ red pepper, chopped
  • 2 tbsp Siracha hot sauce

Directions:

1) Rinse whole lettuce leaves and pat dry, being careful not tear them. Set aside.

2) In a medium skillet over high heat, brown the ground beef in 1 tablespoon of olive oil, stirring often and reducing the heat to medium, if necessary. Drain, and set aside to cool.

3) Cook the onion in the same pan, stirring frequently. Add the garlic, soy sauce, hoisin sauce, ginger, vinegar, and Siracha to the onions, and stir. Stir in chopped water chestnuts, green onions, and sesame oil, and continue cooking until the onions, mushrooms, and red pepper have cooked, about 7-10 minutes.

4) To serve, spoon a portion of the meat into a lettuce leaf. Wrap the lettuce around the meat like a burrito, and enjoy!

I loved this recipe. It kind of reminded me of sushi, in a weird way. Not the ingredients (obviously) but the wonderful feeling of protein inside a leafy, green wrap. Maybe this is a good time to explain that I love lettuce—the taste, the texture, the color. Lettuce wraps pretty much encapsulate (ha!) everything that I love about lettuce while still feeling different and exotic, mostly thanks to the Asian ingredients: sesame oil, water chestnuts, hoisin sauce. Anyway, 4.5 out of 5 for me on this: it was awesome. The Boyfriend said he liked it too but he would have rather eaten the beef mixture over rice than inside a lettuce leaf.

We were under a time crunch so we made a simple side dish: sautéed kale. And when I say we, I really mean him: The Boyfriend graciously took care of the kale so I could focus on dinner and we could get out of the door sooner rather than later. The kale was okay—this is one of our go-to recipes because it is easy but it won’t win any flavor awards anytime soon. It is definitely competent but not exciting, if you know what I mean. He did a great job with it, the recipe is just not very exciting; but it is easy and it tastes good.

Sautéed Kale

Adapted from a recipe at Foodnetwork.com

Ingredients

  • ½ bunch kale
  • 3 tbsp olive oil
  • 2 cloves garlic (or 1 garlic scape) chopped
  • ½ cup stock (chicken or vegetable) or water
  • Salt and pepper
  • 2 tbsp balsamic vinegar

Directions:

1) Wash kale; remove stem and cut into bite-sized pieces.

2) Heat olive oil in a large saucepan over medium-high heat.

3) Add the garlic and cook until soft, but not colored.

4) Raise heat to high, add the stock and kale and toss to combine. Cover and cook for 5 minutes.

5) Remove cover and continue to cook, stirring until all the liquid has evaporated. Season with salt and pepper to taste and add vinegar.

Due to all of the green, I was pretty satisfied with the healthiness quotient of this meal.

A twist on meat and potatoes

Standard
A twist on meat and potatoes

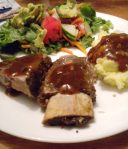
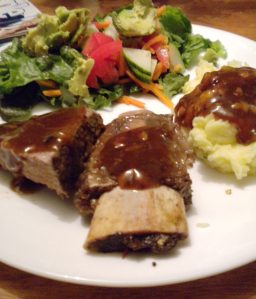
When I think of meat-and-taters, I usually imagine a big steak with a loaded baked potato. Unfortunately, that meal isn’t going to win any healthy awards anytime soon. If you read/remember from the last post, I bought beef short ribs at the farmers’ market on Saturday, so I decided to cook ’em up with some lightened up mashed potatoes. Ok, so it’s not a huge twist on the norm but it is a little healthier and it was super easy to make.

Asian Style Short Ribs

Adapted from a recipe at Blisstree.com

Ingredients:

  • ½ cup soy sauce
  • ½ cup packed light brown sugar
  • 2 tbsp sesame oil
  • 2 tbsp rice vinegar (or sub for 2 tbsp white vinegar + 1tsp lemon juice)
  • 2 tbsp minced fresh ginger
  • 4 cloves of crushed garlic
  • ½ tsp red pepper flakes
  • 2 lbs beef short ribs
  • 3 tbsp cornstarch
  • 3 tbsp cold water

Directions:

1) Mix soy sauce, sugar, oil, vinegar, ginger, garlic and red pepper in a small bowl.

2) Place ribs in a slow cooker and pour sauce over. Cover and cook on high for 6 hours or on low for 9 hours.

3) Transfer ribs to a platter, and skim and discard excess fat from liquid. Place liquid in a saucepan, combine cornstarch and water and add to liquid. Bring to a boil and cook for two minutes, stirring constantly, until thickened.

4) Remove meat from ribs and discard fat. Top meat with sauce.

This was my first time making short ribs and I kinda imagined that they would be cut similar to pork ribs. Nope. It was a giant block of meat and fat with 2 little bones at the bottom. That sorta confused me but I followed the recipe anyway (except that I cooked mine for 4 hours on low and then 2 hours on high). It wasn’t the tenderest beef I have ever eaten (but it certainly wasn’t tough!) so maybe I cooked it too long or not long enough. Something to think about for next time, I suppose!

Also, I had some cornstarch lumps in my sauce (blech!) even though I was whisking it constantly. Maybe the cornstarch and water should be mixed together before going in the sauce? Or maybe not added until the sauce is already boiling? I’m not sure. The sauce did get wonderfully thick; it just grossed me out a little when I bit into a lump of undissolved cornstarch.

Garlic Scape Mashed Potatoes

Ingredients:

  • 1 lb potatoes (I prefer Yukon Golds)
  • 2 tbsp milk
  • 2 tbsp butter
  • 1 tbsp olive oil
  • 1 garlic scape, chopped
  • Salt and pepper, to taste

 Directions:

1) Set a pot of salted water to boil on stove. Peel and quarter potatoes; add to water when boiling.

2) Boil uncovered 10-30 minutes or until fork tender (soft enough to mash); drain.

3) Add potatoes, butter, and milk to bowl; mash until satisfied with consistency (you can use a potato masher, a large spoon, or a fork).

4) Add garlic scape, olive oil, salt and pepper to bowl; stir/beat with fork until well mixed. Top with leftover short rib sauce.

I added the olive oil so that I could use less butter and milk (minus bad fats, + good fats!) but I realized today that plain Greek yogurt would have worked as a substitute for the milk. Greek yogurt has little/no fat and tons of good gut bacteria; it its a good substitute for mayo (if you season it) or for sour cream. If you want to go the olive oil route with the taters here, be aware that more olive oil = more olive oil taste; if you want traditional tasting mashed potatoes, I recommend going the butter/milk (or Greek yogurt) route.

As usual, I made a salad to accompany the ribs and mashed potatoes and filled half of my plate with the salad. I think eating healthy isn’t about denying yourself the things you love (in this case red meat and carbs), but indulging a little while also filling up on healthy things (giant salad of deliciousness!).

Short post today. Go make (or eat!) something!

Movin’ on up

Standard
Movin’ on up

To the east side! To a deluxe apartment in the sky-i!

My long hiatus is now over—we have moved into our house in New York! It’s a whole ‘nother world up here: a world of $0.05 deposits on all glass bottles bought, a world of no parking on certain sides of the street on different days, a world of no central AC*.

I really want to take advantage of this shake-up and make some changes to my lifestyle. I’ll let you in on a secret: I have always battled with my weight. I have a lazy thyroid which contributes some to this problem but most of the responsibility rests on me. I have tried too many diets and have gone on many an exercise binge. While I may lose some weight during each of these phases, these short fluxes are unsustainable and the weight finds me as soon as I go back to my “normal” life.

So new state, new state of mind. I think I have realized my past mistakes and I feel like I am ready and able to make some real life changes. I am focusing on changing my lifestyle gradually into a healthy routine that I can keep up for the rest of my life. I’m going to be accountable to myself but I am also going to be honest with you and be accountable to the blog.

I have a few simple goals for myself:

1)  Be active every day. This might mean walking for an hour with The Boyfriend, exploring our new neighborhood. Or it might mean working out to a Jillian Michael’s DVD**. I would like to try different workout classes (hot yoga, kickboxing, etc) at local places but that will have to wait for now, in the interest of finance.

2) Eat only when I get hungry and only until I am full. I want to stop overeating and I need to stop eating just because I’m bored or because The Boyfriend is eating or just because something tastes good.

3) Eat good-for-me food. This is what I thought would be the hardest since I am used to eating whatever I want to eat. This, unfortunately, usually amounts to several trips a week to McDonald’s or Taco Bell. But actually, after eating so much bad food all summer I am ready for a change. I’ve been eating breakfasts with protein, lunches with lots of veggies and good, lean dinners***.

*We bought our first window-box unit on our third day in NY. Being that I’m from Florida, I never thought I’d live in a place that I would need to BUY an AC unit. But I am happy to report that a 12,000 BTU unit (plus 2 fans) is enough to cool our 1100 ft2 apartment. Also, pro-tip: if you want to cool multiple rooms, you have to get a bigger unit; they may cost more but they cool a much larger area. I offer this advice in case anyone else is facing the dilemma of “What the hell is a BTU?” and “Isn’t it smarter to buy three 5000 BTU units rather than one 12,000 BTU unit?” The answer is no; two 5,000 BTU units is not equal to one 10,000 BTU unit. Rant completed!

**I bought Jillian’s 30 Day Shred DVD about a year ago and I got through 20 days before I let my hectic schedule get the best of me. The DVD was super tough and I loved the results I saw but I hated the monotony—doing the same workout everyday gets old fast. I decided to get a hold of the other Jillian DVDs (Banish Fat, Boost Metabolism; Ripped in 30; No More Trouble Zones; Yoga Meltdown). I have since tried the Ripped in 30 DVD and it is great! Definitely brutal though. The point of the asterisk is to pretty much impress upon you how awesome Jillian’s workouts are. They run you ragged and you curse at the screen and you hate your life; and you see results immediately. If you like quick workouts (24 minutes—including cool down and warm up!) that are high impact, you’ll love Jillian. Well, you’ll hate her but you’ll love how she whips your body into shape.

***Specifically I have been eating 1 egg and a slice of oatmeal toast for breakfast (an old standard: eggs-in-a-hat; look for the recipe in a future blog post, if you’d don’t already know it). For lunch, I have either a veggie wrap or a salad (salad recipe down below!) for lunch and a lean protein + veggie for dinner (ex: last night’s dinner was steamed cod with chipotle/garlic sour cream, roasted broccoli, and a salad. I would usually include a starch in with the dinner meal but as I am without a rice cooker, I have been foregoing the dinner starch and I think it’s working out for the best). I also eat 1-2 snacks per day; this week, the snacks have been half of an apple + a few slices of sharp cheddar cheese OR 1 wedge Baby Bell Light Swiss Cheese with 8 Roasted Garlic Triscuits and 4 slices tomato. Mmm… I also replaced soda with iced tea–iced black tea! I feel really posh when my tea and snack time happen at 4pm, haha.

But enough about me. You’re here for the food, aren’t you?

Iced Black Tea

Ingredients:

  • 1 cup water
  • 1 Twinnings tea bag (I recommend Lady Grey)
  • 1/2 tbsp honey
  • 1 tbsp milk OR 1 tsp lemon juice (optional)

Directions:

1) Fill a coffee cup up with 1 cup water. Heat in the microwave about 1:15.

2) Seep tea bag in hot water about 8 minutes. Remove tea bag and add honey.

3) Pour hot tea over ice in another glass. Add lemon juice or milk if you’d like.

4) Drink with pinky extended.

Super Salad

Makes 2 salads

Ingredients:

  • lettuce, whatever type you prefer (I used a mix of red leaf and green leaf lettuce)
  • 1/4 orange bell pepper, diced
  • 4 cherry tomatoes, quartered
  • 4 slices cucumber, diced
  • 1 small handful shredded carrots
  • 1 chicken breast; seasoned, cooked and chopped
  • 1/2 tbsp cilantro, chopped
  • 1 tbsp feta cheese, crumbled

Directions:

1) Add all ingredients to bowl; toss to mix. Top with 1 tbsp Instant Dressing.

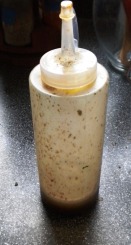
Instant Dressing:

Ingredients:

  • Equal parts extra virgin olive oil and balsamic vinegar
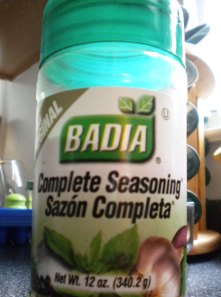
  • Badia Complete Seasoning*, to taste
  • lemon juice (optional)

Directions:

1) Add all ingredients to squeeze bottle. Shake to combine.

*If you have never used Badia’s complete seasoning, you’re missing out. It is delicious! Badia is a self-described “ethnic” seasoning line. They make a ton of spices and they’re usually cheaper than McCormick’s and taste every bit as good; however, their complete seasoning is a cut above the rest. Unfortunately, it does have MSG in it but I still think that the flavor it imparts is worth it.

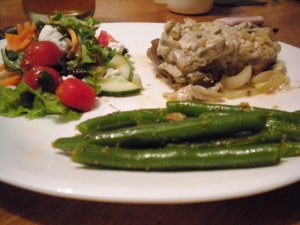
I ate one salad for lunch and split the remaining salad (minus chicken) between The Boyfriend and I for a side dish for dinner. Dinner tonight was steak with mushroom sauce, green beans, and leftover Super Salad. I know that steak doesn’t sound too healthy (or very cost-effective) but we bought shoulder steak! Shoulder steak is very inexpensive (about $3.50/lb at our local grocery store) and an 8oz piece only has 9 grams of fat (compared to 25 grams in a sirloin). My portion was only 4oz which cut the fat total in half. Red meat is still a sometimes food rather than an everyday food, but I urge you to “splurge” and eat steak sometimes. Onto the recipes!

Splurge-tastic Shoulder Steak

Serves 2-4

Ingredients:

  • 1 lb shoulder steak
  • 1/2 cup lemon juice
  • 1/4 cup Bragg’s Amino Acids*
  • 1/4 cup orange juice
  • 4 cloves garlic, quartered
  • 1/4 cup onion, sliced
  • paprika, cayenne pepper, Italian seasoning**, salt and pepper to taste

Directions:

1) 12-24 hours prior to making dinner, make the marinade. Combine lemon juice, Bragg’s, OJ, and garlic in a bowl. Mix salt and pepper, paprika, cayenne, and Italian seasoning together. Rub seasoning onto both sides of the steak. Put the steak in a large Ziploc bag with the marinade and onions. Place the whole bag inside of a bowl so that the marinade completely covers the steak and place the bowl in the fridge. Marinate (preferably) overnight***.

2) One hour before cooking, take bowl out of fridge and sit it on the counter to come to room temperature****.

3) Heat a skillet on medium heat; add ½ tbsp olive oil as well as about 1/3 cup marinade to hot pan and add steaks. Cook 4-5 minutes per side. Remove from pan immediately but let the steak rest for about 10 minutes before cutting into it. Top with mushroom sauce.

*Bragg’s is another product that I highly recommend purchasing. It is a “liquid protein concentrate” that can be used in sauces, marinades, etc. It has a savory taste similar to soy sauce but less salty; it also contains less sodium than soy sauce. Bragg’s is liquid amino acids: amino acids are essential for humans and are only found in food.

**I used one of those premixed Italian seasonings spices but you could make your won. It is typically thyme, oregano, garlic, and dried parsley.

***The reason you need to marinate the steak overnight—this is very important. Shoulder steak is a tougher cut of steak; it is meant to be marinated and/or braised rather than grilled. To render the steak as tender as possible, the steak must be marinated for a long time in an acid-based marinade. The acid helps break down the connective tissue and collagen making the steak tender. If you had a meat tenderizing tool, I would advise using that on the steak before putting it in the fridge. If (like me) you do not own a meat hammer, a regular hammer will do in a pinch. It won’t work quite as well but it’s better than nothing. Also remember that acidic (in this case, lemony) marinade = acidic (lemony) steak. Your steak will taste like whatever your marinade tastes like. I happen to like the light tang to this steak but if you have an aversion to lemon, use a different acid (like vinegar).

****Always cook meat from room temp. I’m not sure why it works but it does.

Creamy Mushroom Sauce

Adapted from Taste and Tell

Ingredients:

  • 1 tablespoon extra virgin olive oil
  • 1 tablespoon butter
  • 1/2 cup chopped onions
  • 4 ounces mixed mushrooms, sliced
  • 1/3 cup water
  • 1 tablespoon Dijon mustard
  • 1 tablespoon Worcestershire sauce
  • 1/2 teaspoon Italian seasoning
  • 1/4 cup low-fat sour cream

Directions:

1) Heat the olive oil and butter in a large saute pan on med-high heat.

2) Add the onion and cook until soft, 3-5 minutes.

3) Add the mushrooms and cook until tender.

4) Stir in the water, mustard, Worcestershire sauce and Italian seasoning; cook for 2 minutes.

5) Turn off heat and stir in sour cream.

Groovy Green Beans

Serves 2-4

Ingredients:

  • 1 lb fresh green beans
  • 3 tbsp butter
  • 4 cloves garlic, chopped
  • 1 tsp lemon juice
  • garlic powder, paprika, Badia Complete Seasoning, salt and pepper to taste

Directions:

1) Start by washing and trimming all of your green beans. For those that have never cooked fresh beans, “trimming” just means snapping the ends off of each bean; think Pollyanna.

2) Add beans to a pot; add enough water to cover beans. Add salt to the pot, cover, and bring to a boil. Boil beans 4-5 minutes.

3) While beans are cooking, prepare a large bowl with ice water. When beans are cooked, drain them and add them to the ice water. Let sit 5 minutes.

4) Heat a nonstick skillet over medium heat.

5) When skillet is ready, add garlic and beans to it. Sauté beans 5 minutes, adding seasonings about 2 minutes in. Immediately remove beans from skillet when finished and add lemon juice.

I didn’t get any pictures of the cooking process—sorry! It’s hard enough to learn how to cook in a new kitchen and I didn’t want to have to stop and take pictures along the way. Expect more pictures (and recipes!) as I get unpacked and more comfortable in my new kitchen.

Beef Bulgogi and Why I Love Korean Food

Standard
Beef Bulgogi and Why I Love Korean Food

Story time! One of my best friends for nearly the last decade (that makes me feel old!) is Korean-American. She lived down the street from me with her Korean mother and decidedly un-Korean stepfather. During high school, we rode the bus (and then later her hand-me-down car) to and from school together; more often than not, we’d get off at either her bus stop or mine together and hang out. If you’ve ever been a teenager you’ll know that a sacred ritual is the after school snack: it’s one of the only times of the day that what you eat isn’t designated by your parents or the school or even the fast food you could walk or drive to during lunch if you were lucky enough to be allowed to eat lunch off-campus. Well, we weren’t allowed to leave school grounds to get lunch which made the after school snack an even bigger deal. The days that my friend A and I went to my house, we subsisted off of pizza rolls, hot pockets, and other stereotypically “American” freezer food. But on the magical days that we went to A’s house after school, I was treated to food from a whole ‘nother continent! At A’s house, there was always a rice cooker full of perfect rice on the counter, always a gallon jar (or 2) of homemade kimchi in the refrigerator, and sometimes there would be leftover kimbap or egg rolls and I could die happy (and full). On these days at her house, A would either join me in my quest to eat as much kimchi as possible or she’d make herself a hot dog while I chowed down. These “snacks” and my friendship with A have made me into a lover of all things Korean (at least food-wise); it didn’t exactly hurt matters that for a good part of high school, A worked as a waitress for the premier (and only–but it was still awesome) Korean restaurant in town.

Until recently, I have never dared to replicate any food item that I could get better at a Korean restaurant. However, I will be moving out of the state next year and I know three things: that A and I will spend less time together than we have been even these past 4 years, that my favorite Korean restaurant might not be in my hometown the next time I visit, and that no matter what, Korean food always tastes like home to me. So with these thoughts in mind (and after a visit to a local Korean restaurant that I found deeply unsatisfying), I decided to tackle the quintessential Korean food: beef bulgogi.

Bulgogi is, simply put, a dish made of marinated beef, pork, or chicken that is cooked in a pan or over an open flame. It is traditionally served over rice with a host of sides (for example: kimchi, boiled bean sprouts, and occasionally, at my favorite Korean restaurant, coleslaw).

I check Foodgawker.com for a recipe and found one that looked suitably inexpensive and “right.” The original recipe is from the blog at Sweet Savory Life but I have posted here the modified recipe that I used. I hope you enjoy it, even if you didn’t grow up with a wonderful ambassador to Korean food like I did 🙂

*Sorry, this still isn’t the one I made; I found it on Google again. However, mine did look quite similar to this! Minus the carrots on top–I’m not that fancy.

Ingredients:

  • 1.5 – 1.75 lbs. of thinly sliced steak (it’s recommended to use rib-eye but we used the sirloin tips that come pre-sliced. Tip: have the butcher slice it for you if it’s not pre-sliced!)
  • 1/3 cup + 2 tbsp soy sauce
  • 3 1/2 tbsp white sugar
  • 1 1/2 tbsp  sesame oil
  • 4-5 cloves of garlic, minced
  • 1/4 to 1/2 of a medium yellow onion, halved and sliced into medium moon shaped slivers
  • 2 green onions, finely sliced into small pieces
  • 1-2 tbsp sesame seeds (toasted or not toasted; omit if you dislike them)
  • 1/2 to 1 tsp of red pepper flakes (adjust for how spicy you want it)
  • 2 pinches of black pepper
  • 1/4 tsp. of ginger, finely minced

Directions:

  • Whisk all the ingredients together in a medium bowl except beef and onions. When most of the sugar has dissolved, add beef and onion slices to the bowl and massage the marinade  with your hands into each slice of beef.
  • Cover and refrigerate for 1 hour.
  • To pan fry, heat a few tablespoons of oil until shimmering (I used olive oil but sesame or vegetable would probably work just as well). Place beef slices completely flat in a large skillet and cook stir-fry style until done (usually 3-5 minutes).
  • Enjoy over a bowl of long-grain or jasmine rice and with a side of kimchi! (a good store brand is King’s Kimchi)