Vegetarian crispy potato tacos

Standard
Vegetarian crispy potato tacos

I am trying to cook (and post) more vegetarian recipes; it is good for me and The Boyfriend to eat less meat and I’d also like to accommodate vegetarian readers. I think it is fair to expect at least 1 vegetarian (or vegetarian-friendly) recipe per week.

I’m sure you know (or can guess) that eating less meat is beneficial to you health but I didn’t know just how beneficial adopting one meat-free day a week could be! According to Greenjoyment, foregoing meat just one day a week can:

  • Reduce your consumption of saturated fat by 15 percent, lowering risk of diseases such as heart attacks, strokes and cancer.
  • Lower your body fat, help curb obesity, and, according to a recent study from Imperial College London, prevent long-term weight gain.
  •  If you are eating less meat, it stands to reason that you are eating more vegetables. And by eating veggies, fruits, grains, and legumes on a regular basis, it can:
  • Increase their disease-fighting benefits.
  • Help you lower your intake of saturated fat and total fat by increasing your intake of fiber, protein, zinc, iron and magnesium.

In addition to all of the wonderful health benefits, Meatless Mondays are also great for the planet! By not eating meat just once a week, you:

  • Reduce your carbon footprint!
  • Use less water! Livestock requires far more water than vegetables or grains (1,800-2,500 gallons of water go into a single pound of beef vs. 220 gallons of water per pound of tofu).
  • Reduce use of fossil fuels! On average, about 40 calories of fossil fuel energy go into every calorie of feed lot beef in the U.S, compared to the 2.2 calories of fossil fuel energy needed to produce one calorie of plant-based protein.
  • Reduce ammonia emission and carbon dioxide emissions since almost 2/3s of the human related ammonia emissions and 9% of human activity related carbon dioxide emissions are due to livestock.
  • Protect wildlife environment: 30% of the Earth’s land that used to be occupied by wildlife is now occupied by livestock.

So many benefits for such a small lifestyle change, right? Without further ado, the recipe:

 Crispy Potato Tacos

Adapted from a recipe at Shop, cook, make

Ingredients:

  • 3 Yukon-gold potatoes
  • ½ white onion
  • 4 garlic cloves
  • 1 red pepper
  • 2 tbsp olive oil OR 1 tbsp olive oil + 1 tbsp bacon grease
  • 2 tbsp cilantro, chopped
  • 1 tsp red pepper flakes
  • 1 tsp ground cumin
  • 1 tsp Spanish paprika
  • 1 tsp brown sugar
  • 1 tsp Badia Complete Seasoning
  • Salt and pepper, to taste
  • Optional: 1.5-2 oz tequila
  • Small tortillas
  • Toppings for tacos (avocado, more cilantro, tomatoes, lettuce, etc)

 Directions

1) Preheat the oven to 400 degrees.

2) Peel the potatoes and cut into small cubes.

3) Chop the pepper, onion and garlic; add to chopped potatoes in a bowl.

4) Add the oil(s) and all spices to bowl of ingredients; mix until potatoes/onions/peppers are all evenly covered in oil and spices.

5) Add cilantro and tequila (if using) to mixture; mix again.

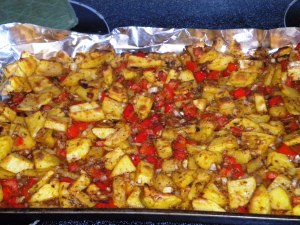
6) Cook for 20-25 minutes; turn oven to broil and cook an additional 5-7 until brown and crispy.

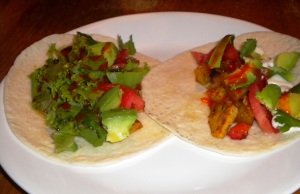
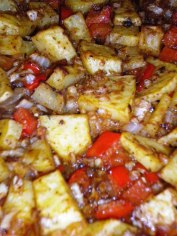
So much tasty

Close-up on the crispy potato goodness

I created a toppings station with all of the extras for the tacos:
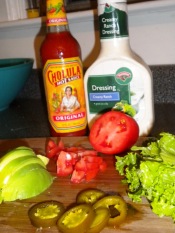
The Boyfriend added chopped pickled jalapeno and chopped avocado to his tacos; I added lettuce, tomato, and chopped avocado to mine. We also both used a little bit of cilantro, a twist of lemon, and Chalula hot sauce on the tacos. To keep these tacos healthy, neither of us used cheese or sour cream; however we both used a little bit of ranch dressing (well, I used about a teaspoon for both tacos; The Boyfriend used closer to a tablespoon). The combination of the Chalula with the ranch dressing was really great: spicy and creamy, over the smoky flavor and chewy texture of the potatoes. Yum!

The great thing about this dish (besides the flavor) is how versatile it is. These potatoes can be a side dish, served with a fried egg on top for breakfast, or used for a filling in tacos, burritos, or enchiladas. I know this wasn’t strictly vegetarian thanks to the addition of bacon grease but it’s an easy swap to make it friendly for the non-meat eaters. I added the bacon grease mostly because I had it lying around and I’ve been itching to use it for weeks; but if you’ve got it (and feel favorable towards bacon), I recommend it because it really adds a nice smokiness. I also highly recommend the tequila; it was a nice touch. Mmm…

This was The Boyfriend’s favorite recipe this week! Since he is a self-proclaimed carnivore, seeing him rave over the tacos was a pleasant surprise.

Although maybe the reason that The Boyfriend enjoyed this meal also had to do with the margaritas we made…

Beer-liscious Margaritas

For 2 margaritas

Ingredients:

  • 2 shots (3 oz) tequila
  • 2 oz triple sec
  • 2 oz lemon juice
  • 2 oz simple syrup
  • 6 oz beer
  • Salt, for rim

Directions:

1) Add all ingredients except beer to shake; add ice to shaker and shake until cold.

2) Salt the rim of two martini glasses; divide mixture equally between the two glasses.

3) Fill to the top with beer and enjoy!

Beautiful bubbles!

We may have had more than one a-piece, haha. They are just so darn tasty! We used the super economical (and relatively tasty) Genessee Cream Ale for the beer. I think Corona, Modelo or Dos Equis would have been better but Genessee worked out fine. Baxically you want a light beer that is complimented by lemon or lime. I also recommend making a lot of simple syrup ahead of time (equal parts sugar and boiling water) and just keeping it around for future use in cocktails or sweet tea.

I need some vegetarian recommendations; do you have a favorite vegetarian recipe you can share with me?

PS Did I mention that The Boyfriend brought me flowers? They really brightened my day and my dining room!
Amaretto days and Star Trek nights

Standard
Amaretto days and Star Trek nights

So I’m just going to jump right into the recipes this time!

Amaretto Chicken

Adapted from a recipe at Lol Foodie

Ingredients:

  • 3 boneless, skinless chicken breasts
  • 2-3 tbsp goat cheese, at room temperature
  • 3 thin slices of prosciutto
  • 2 tbsp butter
  • 6 ounces mushrooms, sliced
  • 1/3 cup flour
  • 3 tbsp peanut oil
  • ¾ cup chicken stock
  • 1/8 cup Amaretto liqueur
  • Salt and pepper

Directions:

1) Start by pounding out the chicken breasts. Place a breast in a large Ziploc bag; using a meat hammer (or regular hammer). Pound the chicken until it is very thin, about 1/8″ thick; repeat with other 2 chicken breasts.

2) Season both sides of your chicken with salt and pepper.

3) Spread each chicken breast half with a little less than 1 tbsp of the softened goat cheese. Top with 1 slice of the prosciutto.

4) Roll the chicken into a tight cylinder; tie with kitchen twine. Dredge each chicken “roll” in flour.

5) Melt 1 tbsp of butter over medium-high heat in a skillet (don’t use nonstick).

6) Add the mushrooms; cook until softened, about 5 minutes. Remove the mushrooms to a plate, and set aside.

7) Add the remaining butter and peanut oil to the skillet (still over medium-high). Once melted, add in the chicken rolls.

8) Cook for about 4 minutes on each side, turning 4 times, for a total of 16 minutes. Remove the chicken to the plate with mushrooms.

9) Add the chicken broth to the skillet; being careful about a flare-up, add the Amaretto.

10) Bring the sauce up to a boil, and stir/scrape to deglaze all the bits from the bottom of the pan. Simmer for 5 minutes, or until the sauce has reduced by a third.

11) Return the chicken and mushrooms to the skillet, turning to coat in the sauce and heating through.

No step-by-step pictures again—I’m sorry. But Lol Foodie has wonderful photos that accompany the recipe; if you need help, refer to the original recipe. And ok, yeah, I know this doesn’t sound too healthy: there is liqueur and goat cheese and prosciutto involved for goodness sake! I did modify a few things from the original recipe in the name of health: I decreased the amount of goat cheese (which I would usually frown upon); increased the amount of chicken in the equation (from half a breast to one whole breast per “roll”); and I traded some of the butter for olive oil. In addition, I limited myself to half of a “roll” with my large salad and side of carrots. In other words, it could have been a lot worse.

Did I mention that this was delicious? It was: the outside was so brown and crispy; the inside was moist chicken and creamy goat cheese and smoky, salty prosciutto.

Basil carrots

Adapted from a recipe by Jason and Shawnda

Ingredients:

  • 1 lb whole carrots
  • 2 tbsp olive oil
  • 1 tbsp fresh basil, chopped
  • Salt and pepper
  • Optional: feta cheese

Directions:

1) Preheat oven to 400 degrees.

2) Peel the carrots and halve lengthwise.

3) Toss with olive oil, salt, pepper, and basil.

4) Cover baking sheet with aluminum foil; spread carrots on the baking sheet and cover with more foil.

5) Roast for 40 minutes.

6) If desired, add feta cheese to top of carrots before serving.

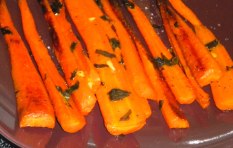
These were tasty! I decided to roast them the way that I normally do rather than the method suggested in the original recipe. The recipe also suggested thyme, which I didn’t have, so I happily substituted the fresh basil I had on hand.

When I pulled the carrots out of the oven, I thought at first that I had burned them; the ends were black and slightly charred looking. I happily found out that the suspicious black pieces of carrot were just caramelized; they had a great chewy texture and a nice sweet and smoky flavor.

The next day (Sunday) was Star Trek night at our friends’ home; these friends started the weekly tradition and so every Sunday we travel to their house to watch, drink, and watch Captains Kirk, Picard, Sisko, Janeway and Archer traverse space and battle foes. I’ve never been a Trekkie but I’m finding that I enjoy Star Trek the more that I watch of it.

Anyway, I really wanted to bring something to our latest gathering because our friends are so nice to host us every week and they usually have snacks and booze for us. And that bring us to snacks! You might see a repeat of a few ingredients from other recipes I used this week and that’s because I like to use what I have in the fridge and cupboards as much as I can; that’s also why I have so many adaptations to recipes that I found online.

Roasted Garlic

Adapted from a recipe at Life’s Ambrosia

Ingredients:

  • 1 bulb (or head) garlic
  • 1 tbsp butter
  • 1 tsp lemon juice
  • Salt

Directions:

1) Preheat oven to 400 degrees.

2) Cut ¼ inch off the top of the bulb of garlic to expose the cloves beneath; do not peel the garlic: you want to roast it in the skin.

3) Place bulb on a piece of aluminum foil; place butter on top of bulb, pour lemon juice over the garlic and sprinkle with salt.

4) Bring up all sides of aluminum foil and twist together to close.

5) Cook for 60 minutes or until garlic cloves are soft and golden in color. Allow to cool.

6) To eat, remove garlic cloves with a fork and spread on top of French bread or good crackers.

If you have never eaten roasted garlic, you are missing out. The flavor is milder, sweeter, and deeper than that of raw or sautéed garlic. It is fantastic with in pasta or on poultry or steak; it is just as great with a nice cheese on a great piece of bread. Seriously, make some now. You won’t regret it.

The next recipe comes from a novel. I recently finished ready Signora da Vinci by Robin Maxwell; the book is a fictionalized account of Leonardo da Vinci’s mother, Caterina. It is a really enthralling read and it is very well-written. In it, the character Caterina da Vinci often makes a compote that her aunt taught her to make. “Compote” is French for mixture but it seems to usually mean a mixture of either fruits or meats cooked on a low temperature for a long time; the result is that the meat or fruit breaks down and the flavors of the dish combine. This particular compote is made with olives and grapes and fresh herbs. Yes, I am aware of how unusual this combination sounds; The Boyfriend was quite vocal in his doubts as well, and to be honest I was a little unsure of how the flavors would combine. Well all of the doubts were for naught as the compote was delicious and well-received by everyone at Star Trek night.

Grape and Olive Compote

Adapted from a recipe by Robin Maxwell

Ingredients:

  • 1 jar Kalamata olives, pits removed
  • Equal amount red seedless grapes + 3 tbsp
  • 3 tablespoons balsamic vinegar
  • 3 tablespoons extra virgin olive oil
  • 1 tablespoon fresh chopped herb (thyme, basil, or rosemary)

Directions:

1) Mix all ingredients in an ovenproof dish and bake uncovered for one hour at 350 degrees, turning the fruit every 15 minutes with a spoon to recoat them with the oil and vinegar.

2) Serve warm or cold with soft goat cheese on crusty bread or with crackers, or use as a side dish with fish or poultry.

My total snack spread wound up being goat cheese, a bulb of roasted garlic, the olive-grape compote, some slices of Muenster and Habanero cheddar cheeses, pan-fried prosciutto, and a loaf of sliced Italian bread. I’m big on bread and cheese so I was quite content with the finished product; and yes, this was my dinner for the evening, haha.

Ok, so end-of-blog question time: what is your favorite food/recipe to bring to a party?

Nostalgia circle

Standard
Nostalgia circle

I’ve been a little sentimental this week, thinking of all of my friends (whom I miss very much) that live elsewhere. When I got to making the grocery list for the week, I was still in nostalgia-land and so I decided to make chicken adobo. This is a Filipino recipe that reminds me of a great friend—and great chef!—Alberto, who is from the Philippines. Alberto made pork adobo and brought it to share at a recent burn and it was fantastic. Since I can’t have Alberto here right now (boo! He is a great person and gives the best hugs) then at least I can have a taste of his home.

Chicken Adobo

PigPig’s Corner

 Ingredients:

  • 4 chicken thighs, skin on
  • ½ white onion, sliced
  • 5 garlic cloves, smashed and quartered
  • 1/8 cup vinegar (apple cider or white)
  • 1/8 cup soy sauce
  • ½ cup chicken stock
  • 1 tbsp brown sugar
  • 2 bay leaves, dried or fresh
  • 1 tsp whole black peppercorn
  • 1 handful fresh basil, torn

Directions:

1. Heat up a bit of oil in a large pot. Brown chicken pieces on all sides. Leave aside for later use.

2. In the same pot, fry onions until softened and translucent, about 5-7 minutes.

3. Add garlic and fry until fragrant, about 30 seconds.

4. Add all the other ingredients (including chicken) to pot.

5. Bring to boil then reduce heat to simmer until sauce thickened, about 30-45 minutes.

6. Stir in basil and serve over rice.

The chicken was really tasty and beyond easy. It made enough for about 6 meals for us because The Boyfriend eats an entire thigh per meal and I eat about ½ a piece. When I told Alberto about making adobo, he gave some great advice for the leftovers:

“Shred the chicken while reducing the sauce (or add cornstarch + water) to thicken. Fry shredded chicken and top with thickened sauce. Great with rice and fried eggs or in a sandwich with slices of tomato.”

It sounds like a tasty way to eat up the leftover chicken; The Boyfriend and I will probably give it a try for lunch tomorrow.

I served the chicken with a great veggie stir-fry and jasmine rice.

For the stir-fry, I used carrots, broccoli, yellow cauliflower, green onion, and red pepper. It was a nice accompaniment to a yummy meal.

Yellow cauliflower: more nutritious regular cauliflower!  And our grocery store was out of the normal stuff. The Boyfriend said that he preferred the taste of the  yellow cauliflower actually, even though I thought they tasted the same.

I’m sorry that I have such random pictures lately. It’s just been difficult to coordinate prep work and cooking and cleaning with taking step-by-step photos. I’ll try to get better pictures in the coming weeks.

Yay Pepsi Throwback! Made with real sugar and tastes way better than regular canned Pepsi. Mmm!

I’m trying this new “end posts with a question” thing so tonight’s question: do you have any nostalgic food? Foods that you make or eat when you feel sentimental or food that makes you feel sentimental?

I’m trying this new “end posts with a question” thing so tonight’s question: do you have any nostalgic food? Foods that you make or eat when you feel sentimental or food that makes you feel sentimental?

Quick update and an easy recipe

Standard

Update! My job interviews went well; that’s right interviews. I got a phone call that turned into a phone interview right after I got home from my first interviews. Fingers crossed that one of these turns into a full-time position for me!

In celebration of two successful interviews, The Boyfriend and I hit Home Depot again to pick up some curtain rods; tonight I will say good-bye to ugly bedroom blinds and a stupid closet door and hello to pretty bedroom curtains! Yay!

 Ugly blinds before

Pretty curtain after!

Space-wasting closet door before

Pretty new closet curtain after!

 Ok, quick recipe time! I bought some delicious blue cheese (mmm) at our local co-op and after nom-ing on a small snack of Miss Vickie’s jalapeno potato chips and blue cheese, I decided to make dinner. I had 2 goals for dinner tonight: I needed dinner to be easy and I also wanted to clean out the fridge of leftovers. Voila! Miracle chicken was born (I called it Miracle because it tasted too good to be so easy).

 Miracle Chicken  

Ingredients:

  • 1 chicken breast, seasoned and cooked
  • 4 oz mushrooms
  • ½ white onion
  • 3 cloves garlic
  • 1 oz blue cheese
  • 2 tbsp olive oil
  • 2 tsp balsamic vinegar
  • 2 tbsp seasoned bread crumbs
  • Salt and pepper, to taste

 Directions:

1) Chop up the garlic and onion; wash and dry mushrooms.

2) Heat olive oil in skillet over medium-high heat; add garlic, onion, and mushrooms. Salt and pepper the mixture and sauté for 5-7 minutes.

3) Add balsamic vinegar to skillet and cook mushroom mixture for another minute or until brown and slightly crunchy; remove from skillet.

4) Butterfly cooked chicken breast; spoon mushroom mixture over the chicken breast. Top with blue cheese and breadcrumbs.

5) Broil chicken for 2-3 minutes or until cheese is melted and breadcrumbs are browned. Eat ½ of the portion and serve with a giant salad to assuage the guilt.

 No pictures, sorry; I ate it too fast! This was delicious. And decadent. And easy. And I didn’t feel that it was too bad for me since I only ate a small portion. If you’re nervous about blue cheese, I urge you to try it; yeah, it has a strong smell and is kind of gross if you think about the fact that it’s moldy but it’s also creamy and unctuous and it can really be the belle of the ball in a dish like this. I guess if you have a strong aversion to blue cheese, you could probably swap the blue for goat cheese, but I really recommend the blue.

‘K, that’s it for tonight. New tradition: Question of the Blog! Tonight’s question: what is your favorite cheese? I think I need to work on my question-asking skills…

Spicy food for a spicy day!

Standard
Spicy food for a spicy day!

Today has been pretty great, spicy in fact. I have 3 exciting pieces of news to share!

  1. The future
  2.  Home improvements
  3. Welcome home

Ok, so first up something exciting about The Future. That sounds nicely cryptic, right? Well I won’t keep you in suspense any longer—I have a job interview tomorrow! I won’t tell you where because I don’t want to jinx it but fingers crossed that I get hired!!

Number 2 (ha!): home improvements. I’m sure that I mentioned that The Boyfriend and I have a laundry list of things we want to do to our new place (and if I didn’t, I’m mentioning it now). Seeing as neither one of us have an income right now, we have to tackle our “honey-do list” slowly (aka inexpensively). Today we hit up our local Home Depot and spent about $25 picking up supplies to work on 2 projects. The first project is putting in shelves in our common closet! Our apartment really doesn’t have a common closet so The Boyfriend and I made one out of one of the pantries in our kitchen. Fortunately, it is a nice big closet; it used to house our refrigerator! Unfortunately, it requires a bit of work before it can be an efficient closet; we’ve already taken the door off of its hinges and now we just need to put up a few shelves and a curtain rod + curtain. First step, putting up a shelf! It cost about $12 for the entire project: 1 piece of wood (3/4” x 11” x 48”), 2 brackets (we opted for the fancy ones so we could also install a hanging bar), and some screws (we bought a pack up 10 for $1.00; #8 x 1” flathead). I won’t take credit for this project—The Boyfriend screwed the brackets to the wall and then to the shelf and mounted the whole thing. I think it took him about 30 minutes and he said his hand was sore when he was done but that it was worth it.

I probably should have documented the process better (and I will in the future!) but I just thought of adding my home improvements to the blog like 5 minutes ago. However, I do have an old before picture and a new after picture that I can share!

Before:

After:

Bam!

The second home improvement task that we accomplished today was the creation of an ‘Art While You Fart’ set-up in our bathroom. AWYF is something that I first saw at a burn (more about those later); at the burn, it was a poster board hung inside the port-o-johns with a marker attached. In another joint venture, I noticed the perfect “chalkboard-like” space to the left of our toilet and The Boyfriend spray-painted it with chalkboard paint. Bam! Instant art…while you fart. The only thing left for that is installing a chalk shelf and buying chalk. I’ll post a picture of the AWYF space as soon as there is some art on it!

Ok, last update and then recipes, I promise! Maybe you’re wondering what the “welcome home” means. Well even if you’re not, I’m going to tell you. The Boyfriend and I (along with a good group of friends) bought our tickets for Playa del Fuego tonight! Playa del Fuego (PDF) is a northeast regional Burning Man event. I could try to explain what burns are but I think I’ll let the wiki page do it for me. PDF is a smaller (1200 people compared to BM’s 50,000) regional burn that happens in Delaware in May and October. It will be my fifth burn but my first time at PDF. I am beyond excited! The “welcome home” title refers to the greeting (+ a hug!) that every single person gets when they get to a burn; virgin burners (first-time burners) also traditionally get paddled.

It’s going to good to go home in October; even better will be the reunion at Afterburn* in November.

*AB is a Florida burn. It was my second burn and is still my favorite of the burns that I have been to. Seeing all of our best friends is a pretty great incentive for The Boyfriend and I to make the 1200 mile journey.

Ok, now what you’re really here for: food! With all of the excitement of today, I didn’t have a ton of time to spend on dinner. Nevertheless, it was a solidly tasty effort with very little effort expanded on my part!

Sriracha Chicken

Adapted from a recipe at Whisk Kid

Ingredients:

  • 2 chicken breasts
  • 2 tbsp chopped cilantro
  • 3 tbsp chopped onion
  • 3 garlic cloves, peeled
  • 2 tbsp Sriracha, more or less to taste
  • 2 tbsp hoisin sauce
  • 2 tbsp olive oil
  • 1 tbsp lemon juice salt and pepper to taste

Directions:

1) Place the chicken in Ziploc bag; set aside.

2) Add the rest of the ingredients to a food processor (or in my case, a Magic Bullet) and blend until completely combined. Add marinade to plastic bag and refrigerate for at least 3 hours or overnight.

3) Preheat the oven to 350F; cook the chicken, uncovered, for 20-30 minutes until cooked through.

A wee bit blurry…

For being so easy, the chicken was really tasty. The Boyfriend said “It tastes like actually good Chinese food” so I guess that was a compliment, as well as a testament to the fact that making this wasn’t much harder than ordering take-out.

Balsamic green beans with feta

Adapted from a recipe at Chinese Grandma

Ingredients:

  • 1 lb green beans
  • 2 tbsp olive oil
  • 1/4 cup water
  • 1-2 tbsp balsamic vinegar
  • 2 tbsp feta cheese
  • Salt and pepper, to taste

Directions:

1) Snap ends off green beans and rinse; pat dry.

2) Heat a skillet large enough to hold the beans comfortably; add olive oil.

3) Add green beans to skillet but be prepared for a lot of popping oil. Be careful!

4) Using long tongs, stir the green beans around the pan making sure that they all get covered in oil. Turn the temperature to medium low and cover pan.

5) When the popping has subsided, take the cover off and stir beans again; they should be turning bright green.

6) Add a ¼ cup of water to the pan and cover; cook for 1 minute or until beans are at preferred doneness.

7) Drain excess water from pan; add salt and pepper to taste.

8) Remove beans from skillet; drizzle with balsamic vinegar and sprinkle with crumbled feta.

I’m sold on anything that has feta cheese but in general, these green beans were pretty great. Very easy, very healthy, and a nice change from our normal butter-and-garlic-sauteed green beans.

I bet you’re exhausted reading a post this long (and it IS pretty late at night too), so I’ll just say goodnight for now but I do have one question for the evening: what do you think of Art While You Fart? Totally awesome or so weird?

DIY and a few left-over recipes

Standard
DIY and a few left-over recipes

Sometime in the last week or two amidst all of the cooking and then posting, I forgot to post a recipe, a solid, healthy, easy recipe. Since tonight was a no-brainer meal not really worthy of posting the recipes for (spaghetti; roasted squash; salad; and yes ok, we had garlic bread), I figured that now would be a good time to catch up on what I missed.

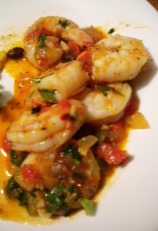
Cilantro Lime Shrimp

Adapted from a recipe at Lana’s Cooking

Ingredients:

  • 1 tbsp butter
  • 1 tbsp olive oil
  • 4 cloves garlic, minced
  • ½ medium onion, chopped
  • 1 jalapeno, chopped
  • ¼ tsp red pepper flakes
  • 1 tsp cumin
  • 1 tsp chili powder
  • 2 roma tomatoes, chopped
  • Juice of 1 lime
  • Salt and pepper, to taste
  • 1 pound shrimp, split and deveined 2 tbsp chopped cilantro

Directions:

1) Melt the butter and oil in a heavy skillet over medium-high heat.

2) Add the garlic, onion and jalapeno. Cook, stirring until the onion begins to wilt, approximately 3 minutes.

3) Add the red pepper, chili powder, and cumin. Continue cooking until the onion becomes translucent, approximately 3 additional minutes.

4) Add the tomatoes. Cook, stirring occasionally, until the tomatoes are soft.

5) Add the shrimp, zest and lime juice, salt and black pepper.

6) Cook until the shrimp are just opaque. Remove the pan from the heat and stir in the cilantro

Black Bean, Corn and Avocado Salad Recipe

Adapted from a recipe at Eclectic Recipes

Ingredients

  • 1 can black beans, rinsed and drained
  • 1 can corn, rinsed and drained
  • 2 avocados, diced
  • 1/2 red onion, diced
  • 1 tomato, diced
  • the juice of 1 lime
  • 2 tablespoons olive oil
  • 1/2 teaspoon cumin
  • salt and pepper to taste

Directions:

1) Add all diced vegetables except avocado to a large bowl.

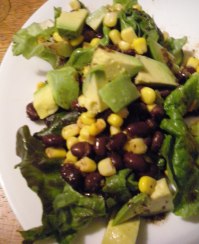
2) Add lime juice, olive oil, cumin, salt and pepper. Mix well to combine. Refrigerate until ready to serve. Add avocado right before serving. Serve over salad greens.

I recommend NOT chopping all of the avocado at once unless you intend on the salad being eaten in one sitting. I just chopped and added the avocado to the salad on the days that I ate it so that I had unspoiled avocado for leftovers.

I haven’t done a ton of cooking in the past few days but I did do some DIY beauty stuff! After a pretty exhausting and frustrating day, I decided that I needed a bath to unwind. I really wanted a bubble bath and my friend, Mrs. H, was chatting to me about DIY-beauty products and one thing led to another and…

Foaming Vanilla-Honey Bath

From Pink of Perfection

Ingredients:

  • 1 cup light oil (almond, sunflower, or canola)
  • ½ cup honey
  • ½ cup mild liquid hand or body soap 1 tablespoon vanilla extract.

Directions:

1) Mix ingredients together in a glass jar. To use, shake gently to remix and pour ¼ cup under running bath water.

Word to the wise: if you don’t have any of the light oil, you can use olive oil; that’s probably not recommended but that’s what I did and it didn’t smell weird or feel funky or anything. I also used Sweet Pea body wash from Bath and Body Works as my soap and that worked out alright. It smelled pretty good and felt nice on my skin.

I have dry skin and don’t have the money to fork over for special, intense moisturizers. However I did have all (really, both) ingredients for an at-home moisturizing mask!

Avocado Mask for Dry Skin

From Pink of Perfection

Ingredients:

  • ½ avocado
  • ¼ cup honey

Directions:

1) Mash the avocado in a bowl, then stir in honey.

2) Apply to skin and leave for 10 minutes, then rinse.

Pros and cons of the mask:

Pros:

  • It tastes good
  • Simple ingredients
  • It made my skin super soft and awesome afterwards

Cons:

  • It was a little (ok, quite) slimy
  • It is really hard to get off of your face.Be prepared for lots of washing
  • The recipe makes enough for 2 masks, so I felt bad about wasting half of it (you should just invite a friend over!)

Overall, I really liked the mask. It definitely made a difference in how my skin felt, for the day and in the week since.

Also, as promised, I am doing better in the exercise department! I did my 30-minute Jillian Michael’s Yoga Meltdown DVD yesterday and then tonight I went on a 30-minute brisk walk with The Boyfriend. I want to get to a place where I am able to do an intense workout EVERY day but right now things just seem to come up that prevent that. Maybe once I get a job (will I ever??) and get on a routine it will be easier.

Oh! If you like DIY home products, you should check out Mrs. H’s blog! She is a newly-married lady exploring her housewife side. She is insanely creative with her DIYs and a lot of them are also really doable. Check her out! Until next time…

Back on the wagon

Standard

You may have noticed that I haven’t written much about exercising lately. Well, I have a confession to make: the last two weeks I have been not as healthy as I should have been. Exercise has been infrequent (ok, nonexistent) and we ate more red meat last week than we should have; also, there may have been some chocolate involved. But I am back on the straight and narrow!

Things to look forward to on my blog this week:

1) Less red meat! In fact, no red meat this week; instead, we’ll be eating salmon, chicken sausage, chicken and veggie spaghetti. I am tired of eggs and toast for breakfast so I need to think of something different for next week but in the meantime I have been having lots of salads, which brings me to…

2) Salad recipes! I have been eating some truly amazing salads and I’ll probably share a few recipes.

3) A recap of my daily exercise. Yep, I said daily, not every-other-daily or once-a-weekly. I need to kick myself into high(er) gear and that starts with more activity.

Bonus! An update on The Great Job Hunt. Yes, I know this isn’t really related to food but it’s relevant in my life so I’ll probably write about it. Things like pimping a resume, going on a job interview, and bemoaning unemployment.

Recipe time! Let’s start with the salad (because breakfast has been boring me lately):

Lox Salad

Ingredients:

  • 1 handful green leaf lettuce, torn into bite-sized pieces
  • 2 tbsp diced red pepper
  • 2 tbsp shredded carrots
  • 1 tbsp diced tomato
  • 4 slices cucumber, quartered
  • ½ avocado, diced
  • ½ tbsp chopped cilantro
  • 1 oz smoked salmon, chopped
  • ½ oz feta cheese, crumbled
  • 2 tbsp Instant Dressing

Directions:

1) Add lettuce to bowl; top with remaining salad ingredients and dressing. Enjoy!

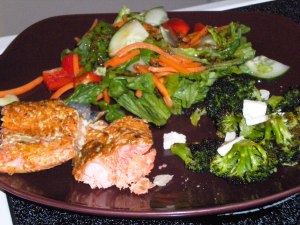
This salad is super easy, super flavorful, full of good fats (poly/mono-unsaturated from the dressing and the avocado, omega-3s from the salmon) and really, really delicious. But don’t take my word for it—make it yourself!

Dinner time!

Sweet and Spicy Salmon

Adapted from a recipe at Unwined-TN

Ingredients:

  • 1 tbsp chili powder
    1 tsp pepper
    ½ tbsp ground cumin
    ½ tbsp paprika
    ½ tsp salt
    ¼ tsp curry powder
    ¼ tsp cinnamon
    ½ tsp brown sugar
    3 cloves garlic, minced
    1 tbsp olive oil
    1 lb fillet sockeye salmon

Directions:

1) Mix chili powder, pepper, cumin, paprika, salt, cinnamon, and brown sugar in a small bowl. Rub spice mixture all over fish, making sure to get sides and top of fish.

2) Tear off a piece of tinfoil that is about twice the size of the fillet. Grind salt and pepper in the middle of the foil; add minced garlic and pour tablespoon of olive oil on top.

3) Center fish over the garlic/olive oil on tinfoil. Fold tinfoil up around fish, making a pouch. Put pouch on preheated grill and cook for about 10 minutes.

While I adapted the rub from the recipe at Unwined-TN I borrowed the method of cooking from A Newf in my Soup:En Papillote, French for in parchment, is a method of cooking food in a folded and sealed pouch or parcel, and then baked. The parcel is typically made from folded parchment paper, but a paper bag or aluminium foil works equally well. The food steams in moisture from the food itself, or from added water, wine, or stock.  Vegetables, herbs and spices add to the flavor.” So there you are. I have wanted to try cooking fish en papillote for a while but I had my eye on a recipe that uses phyllo dough as the bag and that doesn’t exactly fit in with my new ideas on eating healthy. Serve the sweet and spicy salmon with roasted broccoli and a salad for maximum health!

Roasted Broccoli with Garlic and Feta

Adapted from a recipe at A Couple Cooks

Ingredients:

  • 1 bag broccoli florets (or 1 head broccoli, cut into florets)
  • 5 cloves garlic
  • 2 tbsp olive oil
  • salt and pepper
  • 1 tbsp lemon juice
  • ¼ feta cheese, crumbled

Directions:

1) Preheat the oven to 425°F.

2) Cut each garlic clove into quarters.

3) Add broccoli and garlic to a bowl and toss with olive oil. Add salt and fresh ground pepper.

4) Line a baking sheet with tinfoil; add broccoli and garlic to sheet, spreading it out evenly. Roast the broccoli for about 20 minutes.

5) Put broccoli and garlic back to bowl; add feta cheese and top with lemon juice.


Man Food

Standard

The Boyfriend is big into “Man Food”: bad for you, totally epic food made out of everything in the cupboard. I think he feels this is a balance to the healthy stuff I make, haha. He wanted to improve upon the last epic dog and so we did. With that, I bring you:

Epic Dog II: The Reckoning

Ingredients:

  • 1 hot dog (Hebrew National brand)
  • 1 bun
  • 2 slices bacon
  • ½ oz (3 slices) habanero cheddar cheese
  • 1 tbsp ranch
  • 1 tbsp pickled jalapeno slices, chopped
  • 2 tbsp crushed Mrs. Vickie’s jalapeno chips

 Directions:

1) Start by cooking the bacon. You can cook it however you want—oven, microwave, skillet—but I highly recommend frying it to achieve maximum bacon-crispiness.

2) While the bacon is cooking, get your cheese sliced, your jalapenos chopped, your chips crushed, and the hot dog cooked.

3) Remove bacon from skillet and drain grease. Halve each piece of bacon so that you have 4 small pieces rather than 2 huge ones.

4) Assemble hot dog as so: bun, hot dog, bacon, jalapenos, and cheese. Pop the whole thing in the oven at broil until cheese melts. Remove from oven and top with ranch and potato chip crumbs.

If you have ever seen Epic Mealtime than you know that they keep a fat and calorie counter at the bottom of the video. Their concoctions are usually in the tens of thousands of calories and always have double- or triple-digit fat grams. The Boyfriend decided that he wanted to go full-on EMT and see how his epic dog compared. If you want to enjoy this dog then you should probably ignore the next part: SPOILERS AHEAD!

Food Calories Fat
Bun 110 1.5
Hot dog 110 9
Bacon 80 7
Cheese 55 4.5
Ranch 70 7
Chips 50 3
Total 475 32

A very green dinner

Standard

My last entry for Farmers’ Market week! This time our local ground beef was the star, with the fresh kale in a supporting role.

Asian-Style Lettuce Wraps

Adapted from a recipe at The Cynical Chef

Ingredients:

  • 16 butter lettuce leaves
  • 1 pound lean ground beef
  • 1 tablespoon olive oil
  • ½ large onion, chopped
  • 4 cloves fresh garlic, minced
  • 2 tbsp soy sauce
  • ½ cup hoisin sauce
  • 2 tbsp rice wine vinegar (or 2 tbsp white vinegar + 1 tsp lemon juice)
  • 1 (8 ounce) can sliced water chestnuts, drained and quartered
  • 1 bunch green onions, chopped
  • 4 teaspoons sesame oil
  • 4 oz mushrooms, chopped
  • ½ red pepper, chopped
  • 2 tbsp Siracha hot sauce

Directions:

1) Rinse whole lettuce leaves and pat dry, being careful not tear them. Set aside.

2) In a medium skillet over high heat, brown the ground beef in 1 tablespoon of olive oil, stirring often and reducing the heat to medium, if necessary. Drain, and set aside to cool.

3) Cook the onion in the same pan, stirring frequently. Add the garlic, soy sauce, hoisin sauce, ginger, vinegar, and Siracha to the onions, and stir. Stir in chopped water chestnuts, green onions, and sesame oil, and continue cooking until the onions, mushrooms, and red pepper have cooked, about 7-10 minutes.

4) To serve, spoon a portion of the meat into a lettuce leaf. Wrap the lettuce around the meat like a burrito, and enjoy!

I loved this recipe. It kind of reminded me of sushi, in a weird way. Not the ingredients (obviously) but the wonderful feeling of protein inside a leafy, green wrap. Maybe this is a good time to explain that I love lettuce—the taste, the texture, the color. Lettuce wraps pretty much encapsulate (ha!) everything that I love about lettuce while still feeling different and exotic, mostly thanks to the Asian ingredients: sesame oil, water chestnuts, hoisin sauce. Anyway, 4.5 out of 5 for me on this: it was awesome. The Boyfriend said he liked it too but he would have rather eaten the beef mixture over rice than inside a lettuce leaf.

We were under a time crunch so we made a simple side dish: sautéed kale. And when I say we, I really mean him: The Boyfriend graciously took care of the kale so I could focus on dinner and we could get out of the door sooner rather than later. The kale was okay—this is one of our go-to recipes because it is easy but it won’t win any flavor awards anytime soon. It is definitely competent but not exciting, if you know what I mean. He did a great job with it, the recipe is just not very exciting; but it is easy and it tastes good.

Sautéed Kale

Adapted from a recipe at Foodnetwork.com

Ingredients

  • ½ bunch kale
  • 3 tbsp olive oil
  • 2 cloves garlic (or 1 garlic scape) chopped
  • ½ cup stock (chicken or vegetable) or water
  • Salt and pepper
  • 2 tbsp balsamic vinegar

Directions:

1) Wash kale; remove stem and cut into bite-sized pieces.

2) Heat olive oil in a large saucepan over medium-high heat.

3) Add the garlic and cook until soft, but not colored.

4) Raise heat to high, add the stock and kale and toss to combine. Cover and cook for 5 minutes.

5) Remove cover and continue to cook, stirring until all the liquid has evaporated. Season with salt and pepper to taste and add vinegar.

Due to all of the green, I was pretty satisfied with the healthiness quotient of this meal.

Chicken Wings and “cannibalistic” squash

Standard

Two posts in one day! I’m getting good at this. This one is going to be short because I have friends over and I want to get back to the shenanigans that are currently ensuing without me.

Tonight we continued on our local produce track and used up more of our farmers’ market gets: antibiotic- and hormone-free chicken wings and squash! The Boyfriend is a big fan of buffalo wings; me? Not so much. (I attribute that to an unfortunate coincidence when I was struck down with a stomach virus hours after ingesting buffalo wings; but that’s a story for another day). Imagine The Boyfriend’s surprise when I suggested that we cook our new-bought wings buffalo-style. My only caveats were that the wings not be deep fried (for health’s sake) and that they not be so spicy that I couldn’t eat them (for my tongues sake; The Boyfriend has a much higher tolerance for spicy foods than I do. I personally think he is a bit of a spicy-food masochist). Using our new camping grill we were able to keep these babies as healthy as possible while imparting the wings with tons of flavor (and nice char marks).

Grilled Chicken Wings

Adapted from a recipe at Serious Eats

Ingredients:

  • 2 pounds chicken wings
  • 1 tsp cayenne pepper
  • 1 tsp celery salt
  • 1 tsp paprika
  • 1 tsp Badia complete seasoning (or other similar complete seasoning)

For sauce:

  • 2 tbsp butter
  • ½ Frank’s Red Hot sauce
  • 2 tbsp Garlic Sniper (or other hot sauce—Tabasco, etc)
  • 1 tbsp brown sugar
  • 1 tbsp honey
  • 2 tsp white or apple cider vinegar
  • ¼ tsp cayenne pepper

Directions:

1) Preheat oven to 350o and set a gas grill to heat up.

2) Rub wings with celery salt, pepper, cayenne, paprika, and complete seasoning.

3) Melt butter in small saucepan over low heat. Whisk in the rest of the sauce ingredients until combined. Remove from heat and set aside.

4) Put wings on baking sheet; ladle a teaspoon of sauce on top of each wing. Cook in oven for 8 minutes.

5) Remove wings from oven and finish cooking on grill, 3-5 minutes. Once wings are finished, add to bowl with remaining sauce and toss to cover.

Cannibalistic Stuffed Squash

Adapted from a recipe at Raptor Toe

Ingredients:

  • 2-4 small squash, of various type
  • 1 wedge Light Laughing Cow spreadable swiss
  • 2 tbsp cream cheese (or in my case, schmear)
  • 1 tbsp Gar-la-la (optional; or sub for 2 cloves raw garlic)
  • 1 garlic scape, chopped
  • 3 oz mushrooms, chopped
  • 1 tsp jalapeno, chopped
  • 1 tbsp olive oil + more, for drizzling
  • 2 tsp seasoned breadcrumbs
  • Salt and pepper, to taste

Directions:

1) Preheat oven to 350o.

2) Slice each squash lengthwise; using a spoon (or in my case, knife) scoop out innards of each squash; set aside.

3) Place squash on a baking sheet; drizzle with olive oil and sprinkle with salt and pepper. Place in oven and cook for 15 minutes.

4) Chop up leftover squash innards. Add olive oil, jalapeno, mushrooms, innards, and chopped scape to pan; sauté for 5 minutes. Add Gar-la-la and both cheeses to pan; stir until cheese has melted and combination is well mixed.

5) Scoop mixture into squash boats; add breadcrumbs to top of squash and place in oven on broil for 3-5 minutes or until bubbly.

Ok, so why is it called cannibalistic squash? Well the original recipe called for the innards of the squash to be discarded. As I was making this recipe, we had a friend expectantly join us for dinner so I wanted to try to stretch the meal a  little farther; I decided to keep the innards and saute them with the rest of the squash stuffing. I guess I called it cannibalistic because I scooped out the insides of the squash and then stuffed them back in and that seemed a little funny and kind of messed up. Maybe not cannibalistic (because the squash wasn’t really eating itself) but, I don’t know, that’s what I thought of. Maybe I should work on my food-naming skills…